Vue中插槽的使用

目录
一、默认插槽
(1)概念
(2)代码展示
(3)后备内容
二、具名插槽
(1)概念
(2)代码展示
三、作用域插槽
(1)概念
(2)使用步骤
(3)用例展示
一、默认插槽
(1)概念
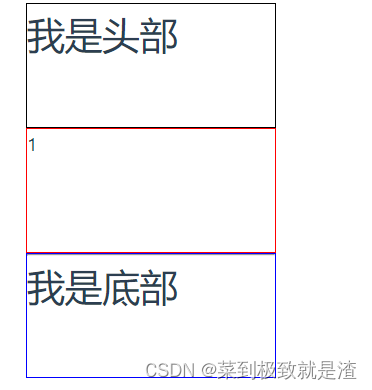
插槽究竟是什么呢?简单来说插槽就是用于决定将所携带的内容,插入到指定的某个位置。举个例子,比如说下面的图:
加入头部和底部都是写死的,但是我们希望主题部分不写死,那么这时候我们就需要用插槽了,也就是说插槽的作用就是让组件内部的一些结构支持自定义。
(2)代码展示
//fa.vue  子组件
<template><div class="fa"><div class="header" style="border: 1px solid black;width: 200px; height: 200px;">  <h1>我是头部</h1></div><div class="main" style="border: 1px solid red; width: 200px; height: 200px;"><!-- 通过slot标签作为展示 --><slot></slot></div><div class="footer" style="border: 1px solid blue; width: 200px; height: 200px;"><hr><h1>我是底部</h1></div></div>
</template>
//父组件 App.vue<script setup> import fa from './components/fa.vue'; </script><template><fa>我是动态插槽----</fa></template><style scoped></style>
(3)后备内容
封装组件时,可以为预留的<slot>插槽提供后备内容(默认内容)。
效果:
外部使用组件时,不传东西,则slot会显示后备内容
外部如果使用组件,传东西,则slot整体会被换掉,显示传的东西。
<div class="main" style="border: 1px solid red; width: 200px; height: 200px;"><!-- 通过slot标签作为展示 --><slot><p>不传东西就显示我</p></slot></div>

二、具名插槽
(1)概念
与前面的默认插槽的作用也是一样的,不过具名具名,就是具有名字的插槽,起名字自然就是为了辨别是哪一个,也就是说一个组件内有多处结构,需要外部传入标签进行定制。
如下图的场景:
这次我想让头部主体和底部三部分都可以动态展示。

(2)代码展示
//App.vue   父组件<template><fa><!-- 通过template配合,名字对应着标签,#head是简写,完整写法是:v-slot:head --><template #head>我是头部</template>
<template #main>
我是中间的
</template>
<template #footer>我是下面的底部
</template></fa></template>
//fa.vue 子组件<template><div class="fa"><div class="header" style="border: 1px solid black;width: 200px; height: 100px;"> <!-- 多个slot使用name属性区分名字 --><slot name="head"></slot></div><div class="main" style="border: 1px solid red; width: 200px; height: 100px;"><!-- 通过slot标签作为展示 --><slot name="main"></slot></div><div class="footer" style="border: 1px solid blue; width: 200px; height: 100px;"><slot name="footer"></slot></div></div> </template><script setup></script><style></style>

三、作用域插槽
(1)概念
其实如果将插槽分类的话,插槽只分成两种,分别是默认插槽和具名插槽,作用域插槽并不在其中。
作用域插槽就是在定义slot插槽的同时,它是可以传值的,给插槽绑定数据,将来使用组件时可以用(父传子)。
(2)使用步骤
(1)给slot标签,以添加属性的方式传值
<slot :id=item.id msg='测试'></slot>(2)所有添加的属性都会被收集到一个对象中
{
id:3,
msg:'测试'
}
(3)在template中,通过'#插槽名=obj'接收,默认插槽名为default
 <fa :list="list"><template #default="obj"><button @click=del(obj.id)>删除</button></template>
</fa>
(3)用例展示
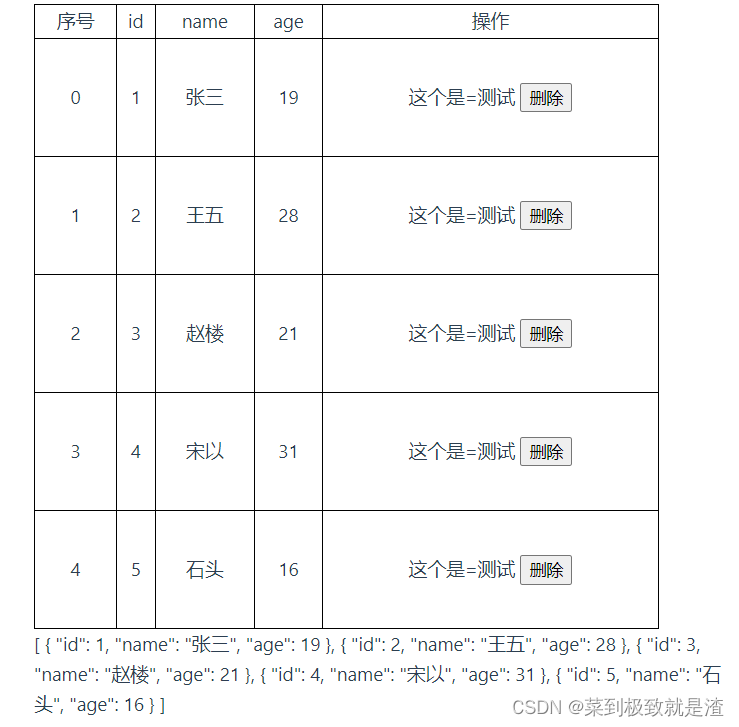
需求:创建一个表格,对表格每一行数据都可以进行删除,根据他的id值
//App.vue<script setup>
import fa from './components/fa.vue';import { ref } from 'vue'
const list=ref([{id:1,name:'张三',age:19},{id:2,name:'王五',age:28},{id:3,name:'赵楼',age:21},{id:4,name:'宋以',age:31},{id:5,name:'石头',age:16}
])const del=(id)=>{console.log(id)//删除操作就是简单的数组过滤list.value=list.value.filter(i=>i.id!=id)
}
</script><template><fa :list="list"><template #default="obj">这个是={{ obj.msg }}<button @click="del(obj.obj.id)">删除</button></template></fa></template><style scoped></style>
//fa.vue<template><div class="fa"><table style="border: 1px solid black;width: 500px;height: 500px;text-align: center; border-collapse: collapse;"><thead><td>序号</td><td>id</td><td>name</td><td>age</td><td>操作</td></thead><tbody><tr v-for="(item,index) in list" :key="item.id"><td>{{ index }}</td><td>{{ item.id }}</td><td>{{ item.name }}</td><td>{{ item.age }}</td><!-- 特殊定制,使用插槽占位 --><td><!-- 传递数据,以对象的形式来接收,比如下面的数据接收是{obj:{id:1,name:.......}msg:'测试'} --><slot :obj="item" msg="测试"></slot></td></tr></tbody></table><div>{{ list }}</div></div>
</template><script setup>const props=defineProps({list:Array
})
console.log('子组件')
console.log(props.list)
</script><style>
td,tr{border:1px solid black;
}</style>