SpringBoot 3 新特性

目录
- 1. GraalVM
- 2. 支持虚拟线程
- 3. HTTP Interface
1. GraalVM
- 使用GraalVM将SpringBoot应用程序编译成本地可执行的镜像文件,可以显著提升启动速度、峰值性能以及减少内存应用。
- 传统的应用都是编译成字节码,然后通过JVM解释并最终编译成机器码来运行,而Spring Native则是通过AOT提前编译为机器码,在运行时直接静态编译成可执行文件,比如windows上的.exe文件,不依赖JVM。GraalVM的即时编译器和AOT编译器可以显著提高应用程序的性能。
- AOT: Ahead-of-Time Compilation,预编译在Java9中作为实验性功能提出。将Java类编译为本机代码,减少Java应用的启动时间和内存占用。
2. 支持虚拟线程
- Spring Boot3.2开始虚拟线程,需要使用JDK21,并设置以下属性
spring.threads.virtual.enabled=true
- 启用虚拟线程后,Tomcat 和 Jetty 将使用虚拟线程处理请求。这意味着处理网络请求的应用代码(如Controller中的方法)将在虚拟线程上运行。下面是Tomcat开启虚拟线程的代码,在
tomcat-embed-core-10.1.19.jar!\org\apache\tomcat\util\net\AbstractEndpoint.class中
public void createExecutor() {internalExecutor = true;if (getUseVirtualThreads()) {executor = new VirtualThreadExecutor(getName() + "-virt-");} else {TaskQueue taskqueue = new TaskQueue();TaskThreadFactory tf = new TaskThreadFactory(getName() + "-exec-", daemon, getThreadPriority());executor = new ThreadPoolExecutor(getMinSpareThreads(), getMaxThreads(), 60, TimeUnit.SECONDS,taskqueue, tf);taskqueue.setParent( (ThreadPoolExecutor) executor);}}
- 创建一个controller

- 启动程序,调用hello接口,查看日志打印
2024-02-24T16:41:15.778+08:00 INFO 14252 --- [omcat-handler-0] com.example.demo.Controller : [Controller][hello] VirtualThread[#46,tomcat-handler-0]/runnable@ForkJoinPool-1-worker-1
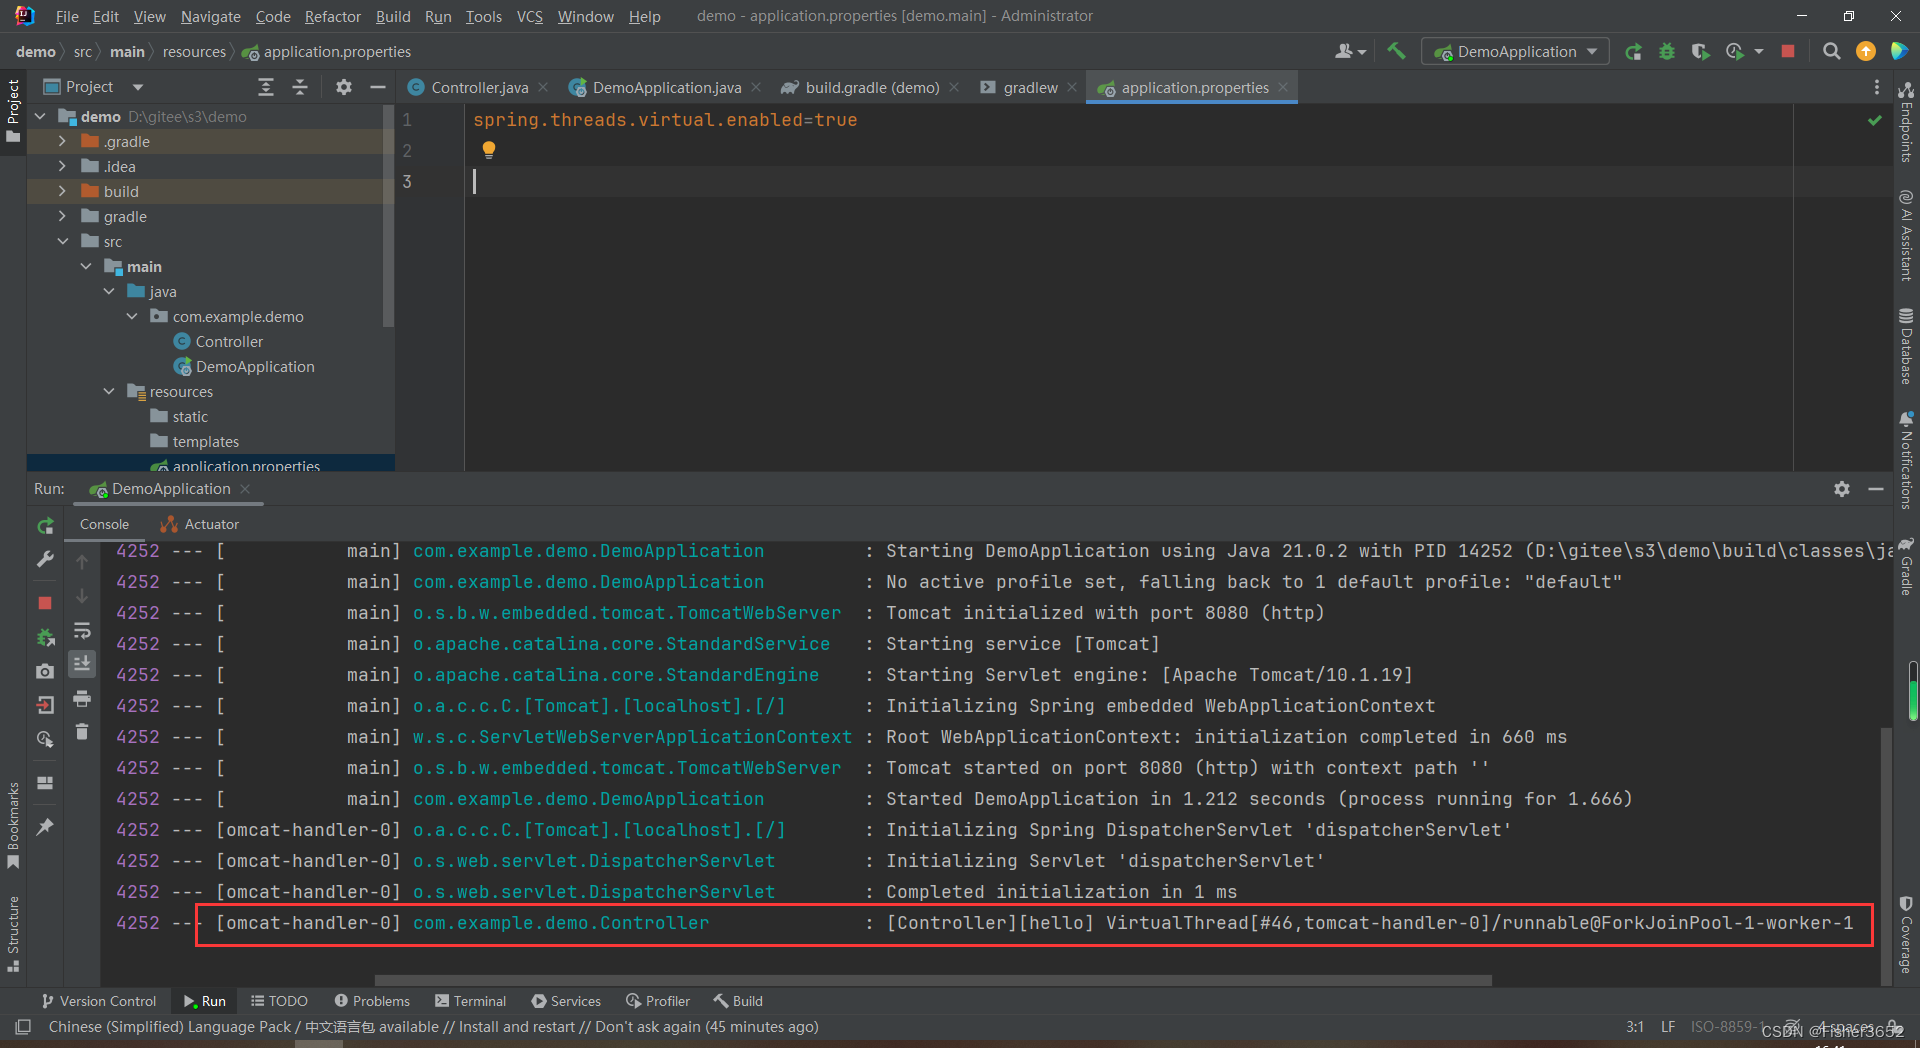
- 通过
VirtualThread[#46,tomcat-handler-0]可以看出使用的是虚拟线程 - 关闭虚拟线程,再次调用接口,查看日志打印
2024-02-24T16:43:14.715+08:00 INFO 15844 --- [nio-8080-exec-1] com.example.demo.Controller : [Controller][hello] Thread[#39,http-nio-8080-exec-1,5,main]
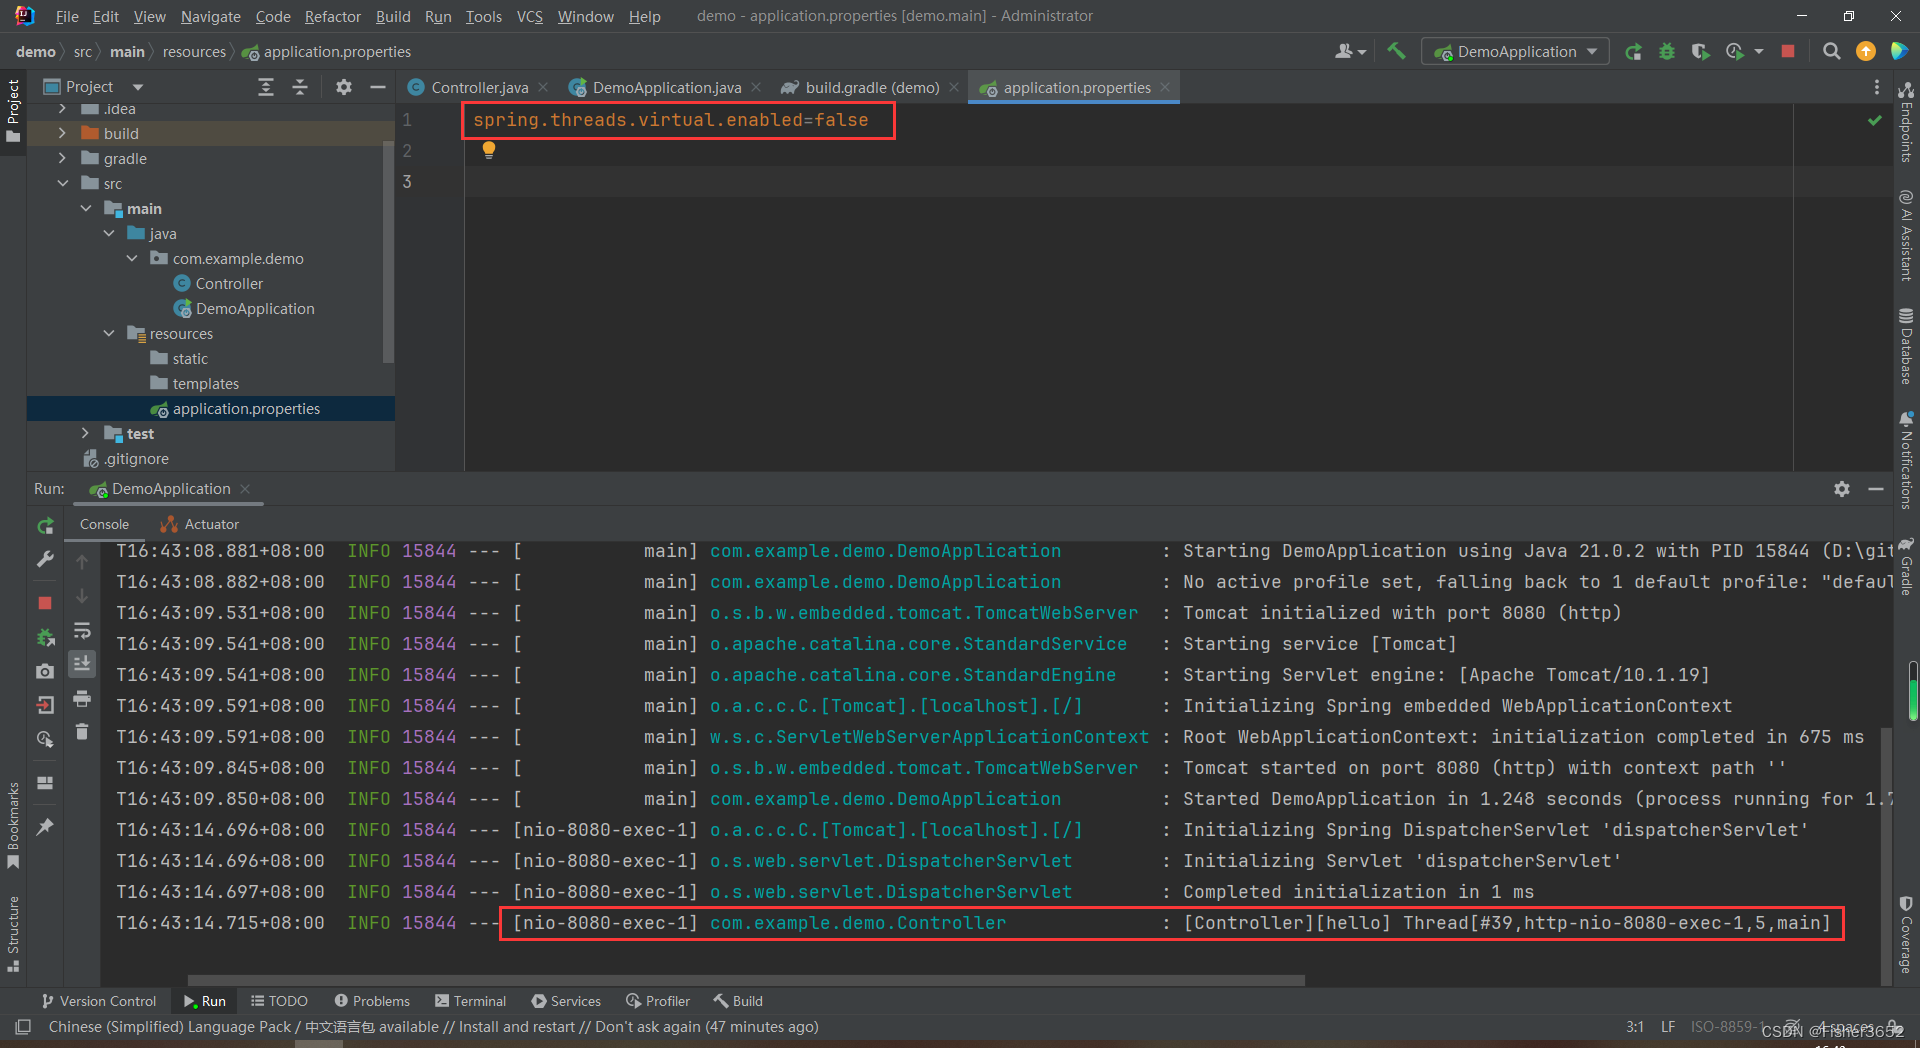
- 通过
Thread[#39,http-nio-8080-exec-1,5,main]可以看出使用的是平台线程
3. HTTP Interface
-
将 HTTP 服务定义为带有 @HttpExchange 方法的接口,并将这样的接口传递给 HttpServiceProxyFactory,创建一个代理,通过 HTTP 客户端(如 RestClient 或 WebClient)执行请求。类似于Feign使用声明式的方式访问Http服务。可以参考https://docs.spring.io/spring-framework/reference/integration/rest-clients.html#rest-http-interface
-
创建一个http interface
import org.springframework.web.bind.annotation.RequestParam;
import org.springframework.web.service.annotation.GetExchange;
import org.springframework.web.service.annotation.HttpExchange;@HttpExchange("/api")
public interface HelloClient {@GetExchange("/hello")String hello(@RequestParam String msg);}- 注入声明式客户端,通过给HttpServiceProxyFactory注入带目标接口baseUrl的client,可以RestClient、WebClient、RestTemplate,这里使用RestClient
import com.example.springboot3.client.HelloClient;
import org.springframework.context.annotation.Bean;
import org.springframework.context.annotation.Configuration;
import org.springframework.web.client.RestClient;
import org.springframework.web.client.support.RestClientAdapter;
import org.springframework.web.service.invoker.HttpServiceProxyFactory;@Configuration
public class AppConfig {@Beanpublic HelloClient toClient() {RestClient restClient = RestClient.builder().baseUrl("http://localhost:80/").build();HttpServiceProxyFactory httpServiceProxyFactory = HttpServiceProxyFactory.builderFor(RestClientAdapter.create(restClient)).build();return httpServiceProxyFactory.createClient(HelloClient.class);}}- Controller
import com.example.springboot3.client.HelloClient;
import jakarta.annotation.Resource;
import org.springframework.web.bind.annotation.GetMapping;
import org.springframework.web.bind.annotation.RequestParam;
import org.springframework.web.bind.annotation.RestController;@RestController
public class HelloController {@Resourceprivate HelloClient client;@GetMapping("hello")public String hello(@RequestParam String msg) {return client.hello(msg);}}- 更具体的修改内容可以查看https://github.com/spring-projects/spring-boot/wiki/Spring-Boot-3.2-Release-Notes