[Angular 基础] - Angular 渲染过程 组件的创建
![[Angular 基础] - Angular 渲染过程 组件的创建](http://pic.xiahunao.cn/yaotu/[Angular 基础] - Angular 渲染过程 组件的创建)
[Angular 基础] - Angular 渲染过程 & 组件的创建
之前的笔记为了推进度写的太笼统了(只有功能没有其他),当时学的时候知道是什么东西,但是学完后重新复习发现有些内容就记不清了,所以重新用自己的语言总结一下
安装 angular-cli 的指令为:
# 如果不确定是否有安装过,可以先卸载
npm uninstall -g angular-cli @angular/cli
# 重新安装 CLI
npm install -g @angular/cli
Angular 项目启动挂载过程
不涉及到 webpack/vite 编译,只是简单的加载过程
首先看一下 angular 项目的架构:
❯ tree --gitignore
.
├── README.md
├── angular.json
├── package-lock.json
├── package.json
├── src
│   ├── app
│   │   ├── app.component.css
│   │   ├── app.component.html
│   │   ├── app.component.spec.ts
│   │   ├── app.component.ts
│   │   └── app.module.ts
│   ├── assets
│   ├── favicon.ico
│   ├── index.html
│   ├── main.ts
│   └── styles.css
├── tsconfig.app.json
├── tsconfig.json
└── tsconfig.spec.json4 directories, 16 files
其中 src 外面的代码都是配置代码,一般来说没有什么变更的需要,目前我能想到的变动的情况只有添加额外的 CSS 库需要变动 angular.json
src 里面则是实现的代码,这里面 index.html 的作用就是一个锚点,也就是组件在没有渲染时的初始界面,内容如下:
<!DOCTYPE html>
<html lang="en"><head><meta charset="utf-8" /><title>MyFirstApp</title><base href="/" /><meta name="viewport" content="width=device-width, initial-scale=1" /><link rel="icon" type="image/x-icon" href="favicon.ico" /></head><body><app-root></app-root></body>
</html>
这与没有被 JS 重写的 HTML 一致:
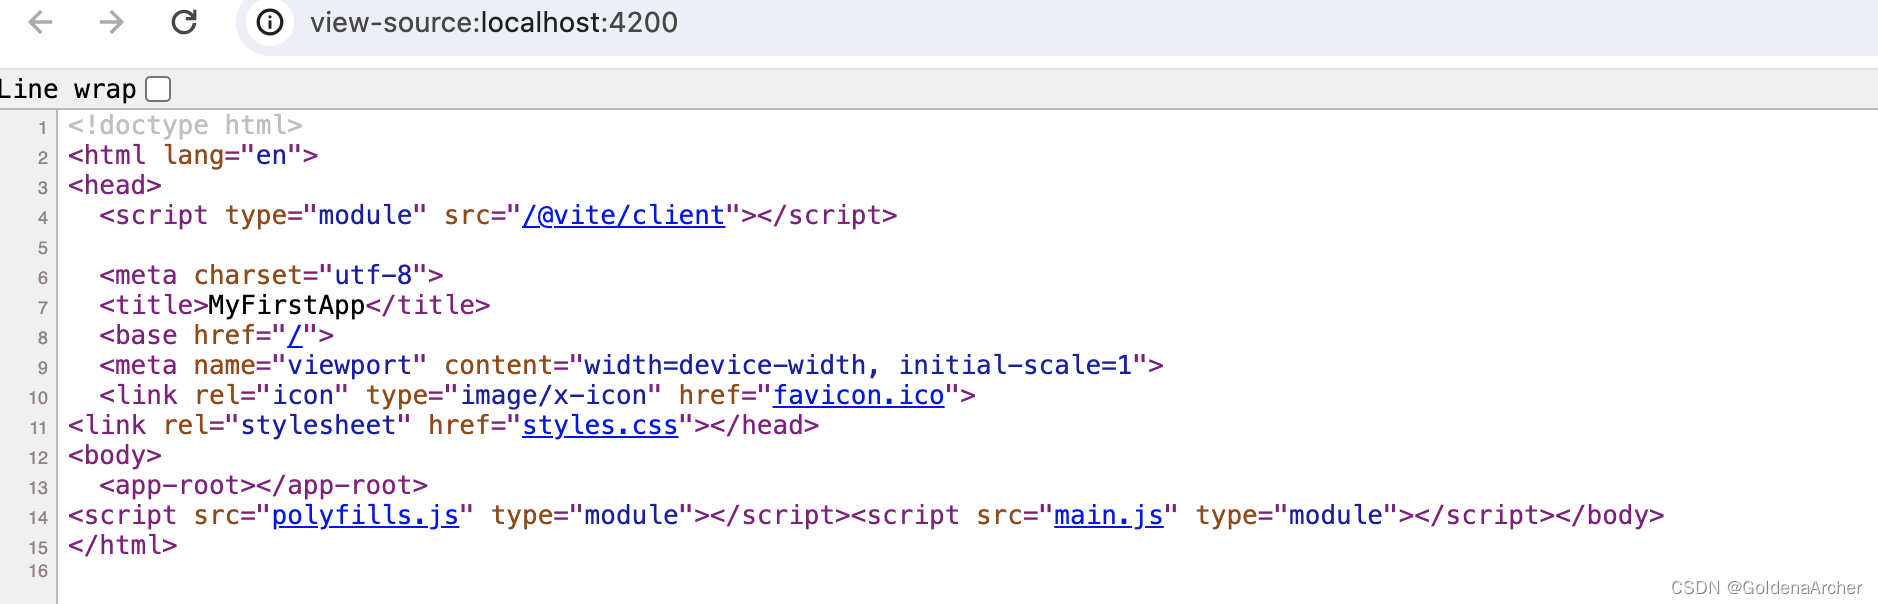
下面的 script 也是在编译的时候添加到 HTML 网页中,具体的配置依旧在 angular.json 中:
{// 省略其他"options": {"outputPath": "dist/my-first-app","index": "src/index.html","browser": "src/main.ts","polyfills": ["zone.js"],"tsConfig": "tsconfig.app.json","assets": ["src/favicon.ico", "src/assets"],"styles": ["node_modules/bootstrap/dist/css/bootstrap.min.css","src/styles.css"],"scripts": []}
}
这里 main.ts 就是项目中 JS 文件的入口,其中主要的作用就是挂在对应的组件:
import { platformBrowserDynamic } from '@angular/platform-browser-dynamic';// 这个作用类似于 React 中的 <App />
import { AppModule } from './app/app.module';// 这个作用类似于 ReactDOM.render(<App />, el);
platformBrowserDynamic().bootstrapModule(AppModule).catch((err) => console.error(err));
而 AppModule 就是一个 Angular 的组件
组件
首先过一下什么是 Angular 组件(component),抛开具体的实现,单纯从概念上来说,React, Angular 和 Vue 的组件都是一样的:
-
模块化的代码
可复用的最小代码块
-
对数据进行处理
最简单的例子就是通过 AJAX 获取数据后渲染给用户看
-
对用户交互进行反应
这点也可以和上一点进行联动,如用户提供了数据之后,组件会对数据进行处理,并且处理过的数据重新渲染在 UI 上
核心概念虽然是一致的,不过具体的实现,如使用的模板——React 使用 JSX,Angular 使用 HTML template、生命周期、组件内传递数据的方式等则会有所不同。
组件的组成
首先看一下 Angular 项目的 src 结构:
❯ tree src
src
├── app
│   ├── app.component.css
│   ├── app.component.html
│   ├── app.component.spec.ts
│   ├── app.component.ts
│   └── app.module.ts
├── assets
├── favicon.ico
├── index.html
├── main.ts
└── styles.css3 directories, 9 files
这个项目是通过 ng new my-first-app --no-strict --standalone false --routing false 运行的,也就是 angular cli 提供的模板文件。这里 app 就是一个组件,其中包含了 5 个文件。
其中最重要的两个核心文件为 ___.component.ts 和 ___.module.ts,而对大多数的组件来说,最核心的是前者的实现,大部分的 ___.module.ts 可能并不太会主动去修改。
下面也会解释为什么 css 和 html 并不一定是核心文件的原因
css
当前 CSS 文件是空的:
❯ cat src/app/app.component.css目前的实现来说,每个 component 中都可以有对应的 CSS 文件,这个对应的 CSS 文件的 作用域(scope) 是当前的组件。
如添加了一个 .header 的 CSS:
.header {background-color: #f2f2f2;padding: 20px;text-align: center;
}
页面上的显示则是:

可以看到,样式并不是直接作用于 .header 上,而是作用于 .header[_ngcontent-ng-c317606715],后者则是随机生成的 Angular 元素的 属性(attribute,目前观测来看,同一个组件都会分享同一个),这样可以有效防止命名冲突的问题
这个 CSS 文件是通过 @Component 这个 decorator 导入的,使用的属性为 styleUrls,接受的参数是一个数组:
@Component({styleUrls: ['./my-component.component.css']
})
在要写的 CSS 比较多的情况下,一般是会创建一个单独的 ___.component.css 文件,但是在 CSS 样式比较短的情况下,则可以省略文件,直接在 decorator 中添加 styles 即可,如:
@Component({styles: [`h1 {color: blue;}button {background-color: green;color: white;}`]
})
之前看的教程说 styles 和 styleUrls 二者只能存在一个,不过现在试了一下,如果二者不冲突的话是都会接受的,而且当前组件如果没有 CSS 的需求,也可以不用放 CSS。
html
这是对应组件的 HTML template,内容如下:
<div style="text-align: center"><h1 class="header">Welcome to {{ title }}!</h1><imgwidth="300"alt="Angular Logo"src="data:image/svg+xml;base64,PHN2ZyB4bWxucz0iaHR0cDovL3d3dy53My5vcmcvMjAwMC9zdmciIHZpZXdCb3g9IjAgMCAyNTAgMjUwIj4KICAgIDxwYXRoIGZpbGw9IiNERDAwMzEiIGQ9Ik0xMjUgMzBMMzEuOSA2My4ybDE0LjIgMTIzLjFMMTI1IDIzMGw3OC45LTQzLjcgMTQuMi0xMjMuMXoiIC8+CiAgICA8cGF0aCBmaWxsPSIjQzMwMDJGIiBkPSJNMTI1IDMwdjIyLjItLjFWMjMwbDc4LjktNDMuNyAxNC4yLTEyMy4xTDEyNSAzMHoiIC8+CiAgICA8cGF0aCAgZmlsbD0iI0ZGRkZGRiIgZD0iTTEyNSA1Mi4xTDY2LjggMTgyLjZoMjEuN2wxMS43LTI5LjJoNDkuNGwxMS43IDI5LjJIMTgzTDEyNSA1Mi4xem0xNyA4My4zaC0zNGwxNy00MC45IDE3IDQwLjl6IiAvPgogIDwvc3ZnPg=="/>
</div>
<h2>Here are some links to help you start:</h2>
<ul><li><h2><a target="_blank" rel="noopener" href="https://angular.io/tutorial">Tour of Heroes</a></h2></li><li><h2><a target="_blank" rel="noopener" href="https://angular.io/cli">CLI Documentation</a></h2></li><li><h2><a target="_blank" rel="noopener" href="https://blog.angular.io/">Angular blog</a></h2></li>
</ul>
其本身存在的意义就是生成一个对应的 HTML 模板,通过 module 导入到对应的 HTML 元素中。以目前的例子来说,这个 HTML 模板就是重置 index.html 中的 app-root 元素
每个模板也可以通过 Angular 提供的其他指令与数据的处理层进行交互,并完成数据的动态渲染,这一趴可以理解成传统的 View 层
一般 HTML Template 通过 @Component 中的 templateUrl进行导入:
@Component({templateUrl: './my-component.component.html'
})
在创建的 HTML 元素比较少的情况下,也不需要单独创建一个 HTML 模板文件,而是使用 template 创建对应的元素即可:
@Component({template: `<div><h1>Hello, {{ name }}!</h1></div>`
})
⚠️:尽管和 CSS 文件一样可以用两种方式进行创建,但是每个 @Component 必须要有一个 template 和 templateUrl。之前看的教程说template 和 templateUrl 只能二选一,我试着跑了一下,目前的版本是会优先选择 templateUrl 中的内容,而不会报错
spec
测试文件,目前不打算涉及,因此跳过
ts
这个可以理解成 ViewModel 层,它主要的作用就是:
-
创建一个组件类
-
处理元数据(metadata)
这个 metada 指的是创建组件所需要的元数据,也就是
@Component这个装饰器所需要的数据 -
处理逻辑
即处理 HTML Template 中需要渲染的数据,并直接与其交互
一个案例代码为:
import { Component } from '@angular/core';@Component({selector: 'app-root',templateUrl: './app.component.html',styleUrls: ['./app.component.css'],
})
export class AppComponent {title = 'Hello World';constructor() {}sayHello() {alert(this.title);}
}
这里的 @Component 是一个 TS decorator,说白了也是一个语法糖,大致的极简实现如下:
class Component {constructor(config) {this.selector = config.selector;this.template = config.template;this.render();}// 这样就不需要重复实现这个功能了render() {console.log(`${this.template} is mounted to ${this.selector}`);}
}class SomeComponent extends Component {constructor(config) {super(config);}
}const myComponent = new SomeComponent({selector: 'my-component',template: '<h1>Hello, world!</h1>',
});
这样的调用为:
❯ node ang.js
<h1>Hello, world!</h1> is mounted to my-component
我试了一下 TS 的实现:
type ComponentProps = {selector: string;template: string;
};function Component(config: ComponentProps) {return function <T extends new (...args: any[]) => any>(constructor: T) {return class extends constructor {selector = config.selector;template = config.template;constructor(...args: any[]) {super(...args);this.render();}render() {console.log(`${this.template} is mounted to ${this.selector}`);}};};
}@Component({selector: 'app-server',template: './server.component.html',
})
class ServerComponent {}const serverComponent = new ServerComponent();
不过 TS Playground 上有显示报错就是了,不知道不在 TS Playground 能不能跑起来
module
这个文件用来处理当前组件与其他组件的交互,并最终返回一个 NgModule 供其他的模块使用
一个案例代码为:
import { NgModule } from '@angular/core';
import { BrowserModule } from '@angular/platform-browser';import { AppComponent } from './app.component';@NgModule({// Angular 只会渲染 bootstrap 中包含的组件declarations: [AppComponent],// 这里负责导入本模块中 components 要用的模块// 如与表单交互的 FormsModuleimports: [BrowserModule],// service,现在暂时用不到,用到了再补providers: [],// 这里是导出的组件// React 中只能导出一个组件,Angular 则是一个数组bootstrap: [AppComponent],
})
export class AppModule {}
⚠️:main.ts 中使用的就是这个 AppModule
我个人的理解就是,以乐高作对比,component就像一个个乐高积木,拼成功的一个完成品(比如说 🚗、🌲、🏠 这种)就是一个 NgModule,NgModule 又可以组成更大的 NgModule,比如说乐高的城市主题就会包括消防车、飞机、警局等模块。
因此,对于大多数项目——也就是中小型项目来说,一个应用里面存在一个 app.module.ts 就足够了
新建组件
创建组件有两种方式:使用 angular-cli 和 手动创建
手动创建
-
手动创建一个新的文件夹包含
__component.html和__.component.ts即可结构如下:
❯ tree src/app/ src/app/ ├── app.component.css ├── app.component.html ├── app.component.spec.ts ├── app.component.ts ├── app.module.ts └── serverï├── server.component.html└── server.component.tsserver下面的就是新的组件,一般命名规范就是这样的其中
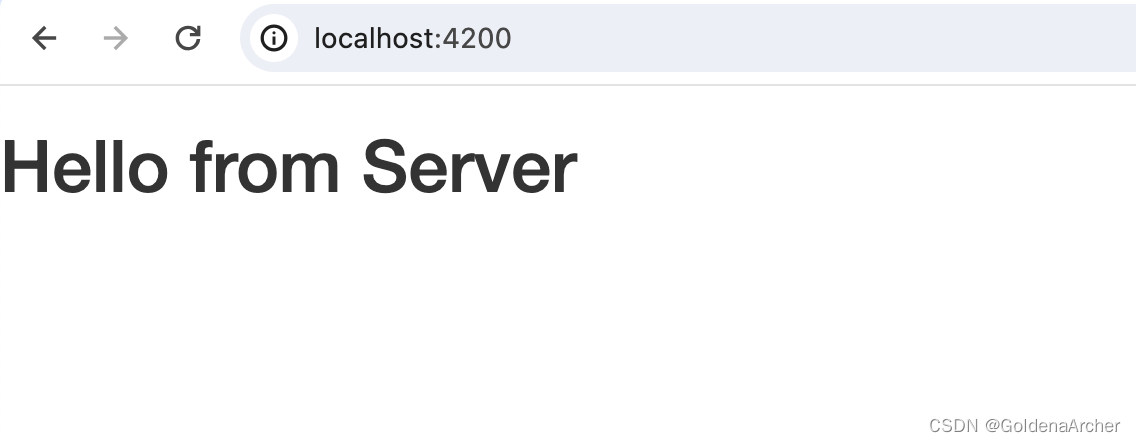
server.component.html的内容为对应实现的模板:<h1>Hello from Server</h1>server.component.ts将对应的 HTML Template 挂载到对应的 div 上——这里在这之前需要在app.component.html中创建对应的 HTML 元素,即<app-server></app-server>。server.component.ts中的代码如下:import { Component } from '@angular/core';@Component({selector: 'app-server',templateUrl: './server.component.html', }) export class ServerComponent {} -
更新
App.module.ts中的declarations前文提过,Angular 只会使用
declarations中提到的组件,因此不更新declarations,无法正确渲染:// 导入,让 TS 可以找到 entry import { ServerComponent } from './server/server.component';@NgModule({// 提供信息给 Angulardeclarations: [AppComponent, ServerComponent],// ...其余不变... })
这个时候 server.component.ts 和 server.component.html 中的内容就可以正确渲染了:
使用 cli
这里使用指令即可:
# generate 和 component 分别可以使用 g 和 c 来代替
# component 为 cli 支持创建的类型,除此之外还有 directive、service、class 等
# servers 为对应组件的名称,想要修改也可以用 folder/component 这样的结构
❯ ng generate component servers
CREATE src/app/servers/servers.component.css (0 bytes)
CREATE src/app/servers/servers.component.html (22 bytes)
CREATE src/app/servers/servers.component.spec.ts (608 bytes)
CREATE src/app/servers/servers.component.ts (203 bytes)
UPDATE src/app/app.module.ts (458 bytes)
此时的项目结构为主:
❯ tree src/app/
src/app/
├── app.component.css
├── app.component.html
├── app.component.spec.ts
├── app.component.ts
├── app.module.ts
├── server
│   ├── server.component.html
│   └── server.component.ts
└── servers├── servers.component.css├── servers.component.html├── servers.component.spec.ts└── servers.component.ts3 directories, 11 files
正常情况下,使用 cli 创建的组件会在对应的 module 中被自动添加到 declarations 中去