nginx负载均衡案例

大家好今天给大家带来nginx负载均衡实验案例,首大家先看一下我的各类版本信息。(还有两台设备信息相同就不展示了)

一,搭建nginx环境
❶首先创建Nginx的目录并进入:
[root@localhost]# mkdir /soft && mkdir /soft/nginx/
[root@localhost]# cd /home/centos/nginx❷下载Nginx的安装包,可以通过FTP工具上传离线环境包,也可通过wget命令在线获取安装包:
[root@localhost]# wget https://nginx.org/download/nginx-1.21.6.tar.gz没有wget命令的可通过yum命令安装:
[root@localhost]# yum -y install wget❸解压Nginx的压缩包:
[root@localhost]# tar -xvzf nginx-1.21.6.tar.gz❹下载并安装Nginx所需的依赖库和包:
[root@localhost]# yum install --downloadonly --downloaddir=/soft/nginx/ gcc-c++
[root@localhost]# yum install --downloadonly --downloaddir=/soft/nginx/ pcre pcre-devel4
[root@localhost]# yum install --downloadonly --downloaddir=/soft/nginx/ zlib zlib-devel
[root@localhost]# yum install --downloadonly --downloaddir=/soft/nginx/ openssl openssl-devel也可以通过yum命令一键下载
[root@localhost]# yum -y install gcc zlib zlib-devel pcre-devel openssl openssl-devel执行完成后,然后ls查看目录文件,会看一大堆依赖:
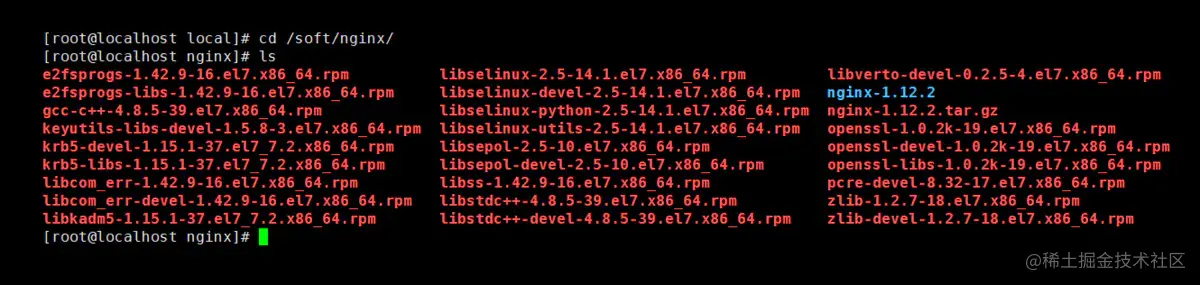
紧接着通过rpm命令依次将依赖包一个个构建,或者通过如下指令一键安装所有依赖包:
[root@localhost]# rpm -ivh --nodeps *.rpm❺进入解压后的nginx目录,然后执行Nginx的配置脚本,为后续的安装提前配置好环境,默认位于/usr/local/nginx/目录下(可自定义目录):
[root@localhost]# cd nginx-1.21.6
[root@localhost]# ./configure --prefix=/soft/nginx/
./configure --prefix=/home/centos/nginx --with-http_stub_status_module --with-http_ssl_module --with-http_sub_module❻编译并安装Nginx:
[root@localhost]# make && make install
yum install epel-release
rpm -ivh http://rpms.famillecollet.com/enterprise/remi-release-7.rpm
yum --enablerepo=remi install php74-php php56-php-devel php56-php-fpm php56-php-gd php56-php-xml php56-php-sockets php56-php-session php56-php-snmp php56-php-mysql
www.conf
user
group
#运行并查看版本
php56 -v
#重启命令php-fpm
systemctl restart php56-php-fpm
#添加自动启动
systemctl enable php56-php-fpm
#查看php7.4的安装路径
whereis php
#链接php文件
ln -s /opt/remi/php74/root/usr/bin/php /usr/bin/php❼最后回到前面的/soft/nginx/目录,输入ls即可看见安装nginx完成后生成的文件。
❽修改安装后生成的conf目录下的nginx.conf配置文件:
[root@localhost]# vi conf/nginx.conf修改端口号:listen 80;修改IP地址:server_name 你当前机器的本地IP(线上配置域名);❾制定配置文件并启动Nginx:
[root@localhost]# sbin/nginx -c conf/nginx.conf
[root@localhost]# ps aux | grep nginxNginx其他操作命令:
sbin/nginx -t -c conf/nginx.conf # 检测配置文件是否正常
sbin/nginx -s reload -c conf/nginx.conf # 修改配置后平滑重启
sbin/nginx -s quit # 优雅关闭Nginx,会在执行完当前的任务后再退出
sbin/nginx -s stop # 强制终止Nginx,不管当前是否有任务在执行❿开放80端口,并更新防火墙:
[root@localhost]# firewall-cmd --zone=public --add-port=80/tcp --permanent
[root@localhost]# firewall-cmd --reload
[root@localhost]# firewall-cmd --zone=public --list-ports⓫在Windows/Mac的浏览器中,直接输入刚刚配置的IP地址访问Nginx:

二,负载均衡实验
我这边是有三台除IP之外都相同的设备,环境只搭了一台剩下两台全靠克隆
三台IP:
192.168.175.128
192.168.175.129
192.168.175.130
一下操作都在129上操作
root@ubuntu-virtual-machine:/home/ubuntu# cd /home/nginx/conf/
root@ubuntu-virtual-machine:/home/nginx/conf# vim nginx.conf
root@ubuntu-virtual-machine:/home/nginx/conf# ../sbin/nginx -t
nginx: the configuration file /home/nginx/conf/nginx.conf syntax is ok
nginx: configuration file /home/nginx/conf/nginx.conf test is successful
root@ubuntu-virtual-machine:/home/nginx/conf# ../sbin/nginx -s reload
root@ubuntu-virtual-machine:/home/nginx/conf#
nginx.conf这个文件的全部内容如下
#user  nobody;
worker_processes  1;#error_log  logs/error.log;
#error_log  logs/error.log  notice;
#error_log  logs/error.log  info;#pid        logs/nginx.pid;events {worker_connections  1024;
}http {include       mime.types;default_type  application/octet-stream;#log_format  main  '$remote_addr - $remote_user [$time_local] "$request" '#                  '$status $body_bytes_sent "$http_referer" '#                  '"$http_user_agent" "$http_x_forwarded_for"';#access_log  logs/access.log  main;sendfile        on;#tcp_nopush     on;#keepalive_timeout  0;keepalive_timeout  65;#gzip  on;server {listen       80;server_name  localhost;#charset koi8-r;#access_log  logs/host.access.log  main;location / {root   html;index  index.html index.htm;}#error_page  404              /404.html;# redirect server error pages to the static page /50x.html#error_page   500 502 503 504  /50x.html;location = /50x.html {root   html;}# proxy the PHP scripts to Apache listening on 127.0.0.1:80##location ~ \.php$ {#    proxy_pass   http://127.0.0.1;#}# pass the PHP scripts to FastCGI server listening on 127.0.0.1:9000##location ~ \.php$ {#    root           html;#    fastcgi_pass   127.0.0.1:9000;#    fastcgi_index  index.php;#    fastcgi_param  SCRIPT_FILENAME  /scripts$fastcgi_script_name;#    include        fastcgi_params;#}# deny access to .htaccess files, if Apache's document root# concurs with nginx's one##location ~ /\.ht {#    deny  all;#}}# another virtual host using mix of IP-, name-, and port-based configuration##server {#    listen       8000;#    listen       somename:8080;#    server_name  somename  alias  another.alias;#    location / {#        root   html;#        index  index.html index.htm;#    }#}# HTTPS server##server {#    listen       443 ssl;#    server_name  localhost;#    ssl_certificate      cert.pem;#    ssl_certificate_key  cert.key;#    ssl_session_cache    shared:SSL:1m;#    ssl_session_timeout  5m;#    ssl_ciphers  HIGH:!aNULL:!MD5;#    ssl_prefer_server_ciphers  on;#    location / {#        root   html;#        index  index.html index.htm;#    }#}}
修改这个部分并保存
upstream nginx_boot{#30s内检车心跳发送两次包,未回复就代表机器宕机,请求分发权重比1:2server 192.168.175.128 weight=100 max_fails=2 fail_timeout=30s;server 192.168.175.130 weight=200 max_fails=2 fail_timeout=30s;#这里的IP需要配置成web服务器所在机器的IP}server {listen 80;server_name localhost;#charset koi8-r;#access_log logs/host.access.log main;location / {root html;index index.html index.htm;proxy_set_header Host $host;proxy_set_header X-Real-IP $remote_addr;proxy_set_header X-Forwarded-For $proxy_add_x_forwarded_for;proxy_pass http://nginx_boot;}#error_page 404 /404.html;# redirect server error pages to the static page /50x.html#error_page 500 502 503 504 /50x.html;location = /50x.html {root html;}
操作完后的效果这时候权重是1:2,两次128一次130



到这里就全部结束了,希望大家多多点赞收藏。