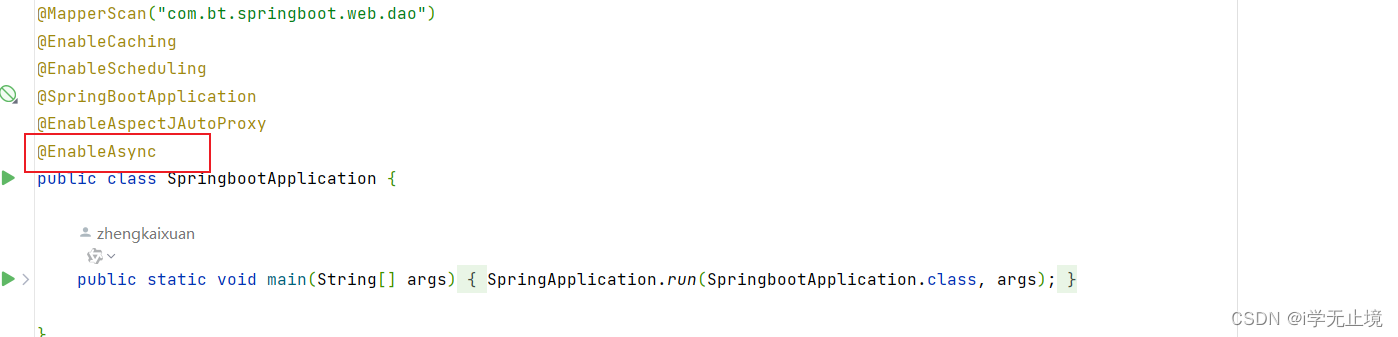
1. 在启动类添加@EnableAsync注解
2.自定义线程池
package com.bt.springboot.config;import org.springframework.context.annotation.Bean;
import org.springframework.context.annotation.Configuration;
import org.springframework.scheduling.concurrent.ThreadPoolTaskExecutor;import java.util.concurrent.Executor;
@Configuration
public class AsyncConfig {@Bean("asyncTaskExecutor")public Executor asyncTaskExecutor() {ThreadPoolTaskExecutor executor = new ThreadPoolTaskExecutor();executor.setCorePoolSize(10);executor.setMaxPoolSize(20);
executor.setThreadNamePrefix("Async-Task");return executor;}}
3.编写要异步执行的任务
package com.bt.springboot.task;import lombok.extern.slf4j.Slf4j;
import org.springframework.scheduling.annotation.Async;
import org.springframework.stereotype.Component;
@Slf4j
@Component
public class UserTask {@Async("asyncTaskExecutor")public void getUserInfo(Long userId){log.info("当前线程:{}", Thread.currentThread().getName());log.info("获取用户Id为{}的信息:", userId);}
}
4.编写测试方法
package com.bt.springboot;import com.bt.springboot.task.UserTask;
import lombok.extern.slf4j.Slf4j;
import org.junit.Test;
import org.junit.runner.RunWith;
import org.springframework.beans.factory.annotation.Autowired;
import org.springframework.boot.test.context.SpringBootTest;
import org.springframework.test.context.junit4.SpringRunner;import java.util.Arrays;
import java.util.List;
@Slf4j
@SpringBootTest
@RunWith(SpringRunner.class)
public class ThreadPoolTest {@Autowiredprivate UserTask userTask;@Testpublic void test(){List<Long> userIds = Arrays.asList(1L,2L,3L,4L,5L,6L,7L,8L,9L,10L);for (Long userId : userIds) {userTask.getUserInfo(userId);}}
}
5.运行测试方法
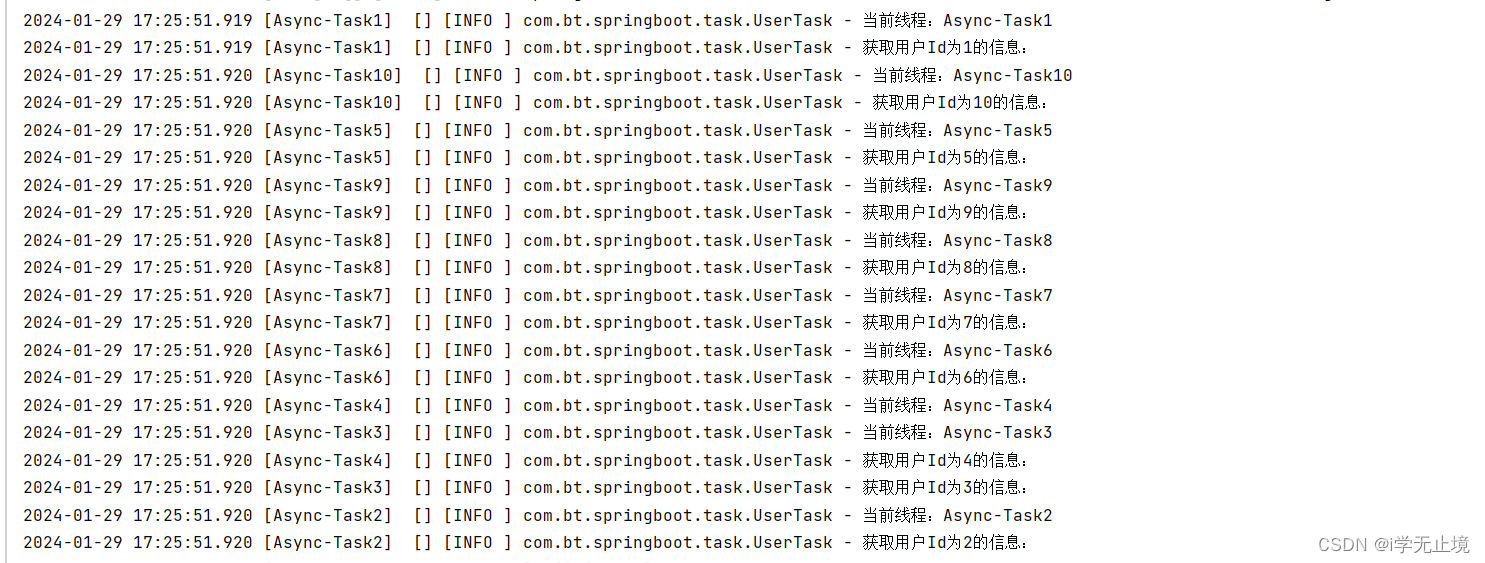
6.打印日志结果