mdev虚拟化PCI串口试验

本篇参考实践Linux 内核文档 Documentation/driver-api/vfio-mediated-device.rst
step 1:Build and load the mtty.ko module.
This step creates a dummy device, /sys/devices/virtual/mtty/mtty/.
打开内核CONFIG_SAMPLE_VFIO_MDEV_MTTY配置项,重新编译内核生成mtty.ko.

重启系统,Files in this device directory in sysfs are similar to the following:
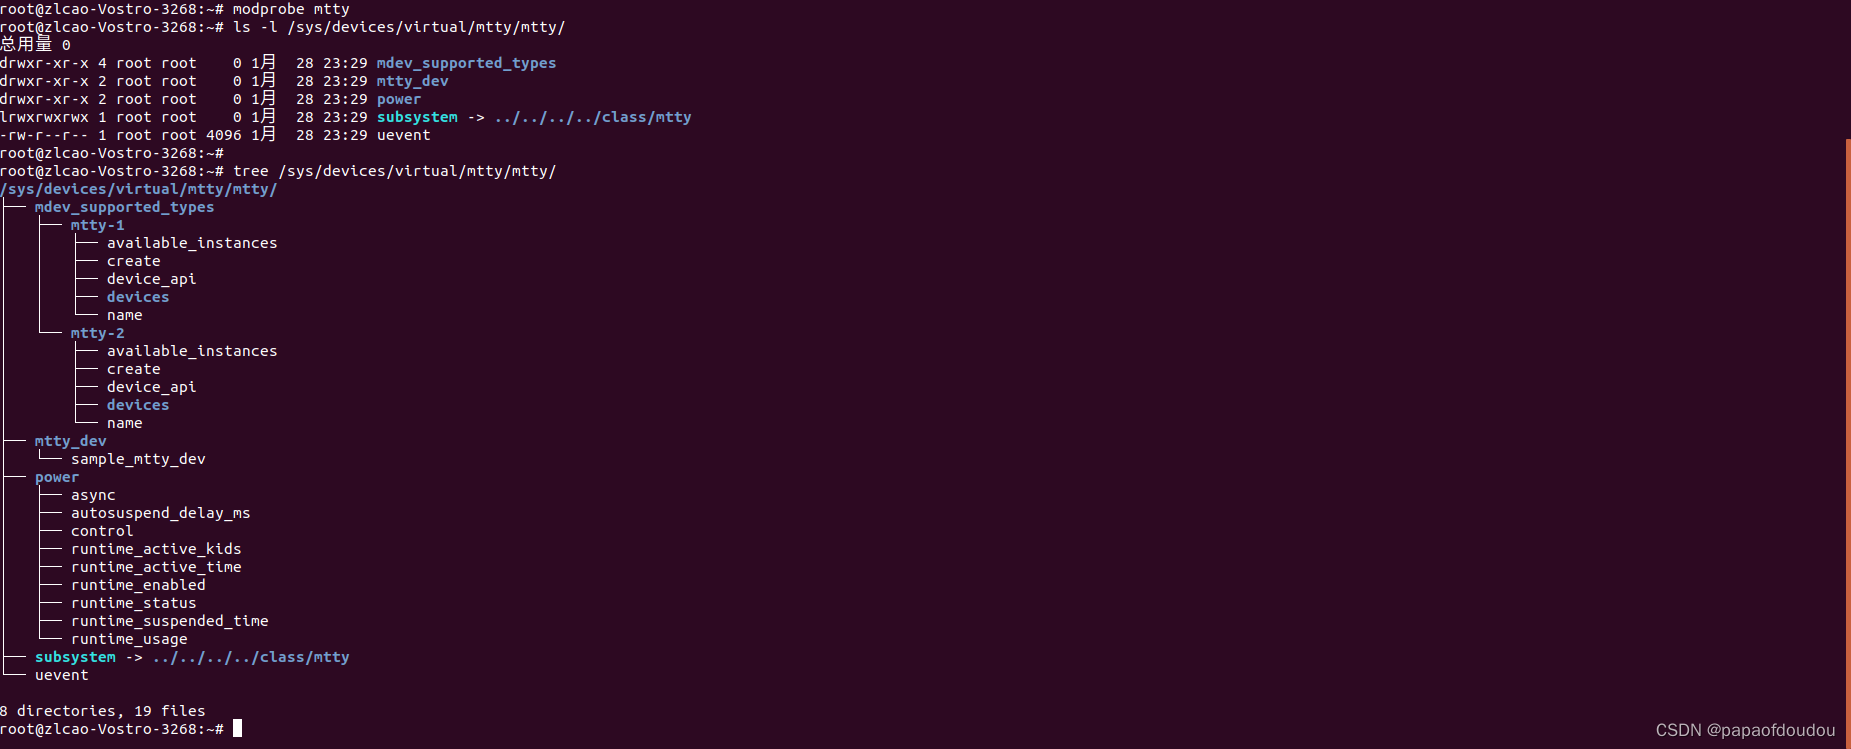
2.Create a mediated device by using the dummy device that you created in the previous step:
# echo "83b8f4f2-509f-382f-3c1e-e6bfe0fa1001" > /sys/devices/virtual/mtty/mtty/mdev_supported_types/mtty-2/create

3.Add parameters to qemu-kvm:
-device vfio-pci,sysfsdev=/sys/bus/mdev/devices/83b8f4f2-509f-382f-3c1e-e6bfe0fa100qemu完整的启动命令为:
$ sudo qemu-system-x86_64 -m 4096 -smp 4 --enable-kvm -drive file=/media/zlcao/7CC840FCC840B5E4/ps.img -device vfio-pci,sysfsdev=/sys/bus/mdev/devices/83b8f4f2-509f-382f-3c1e-e6bfe0fa10014. bootup the vm
In the Linux guest VM, with no hardware on the host, the device appears as follows:

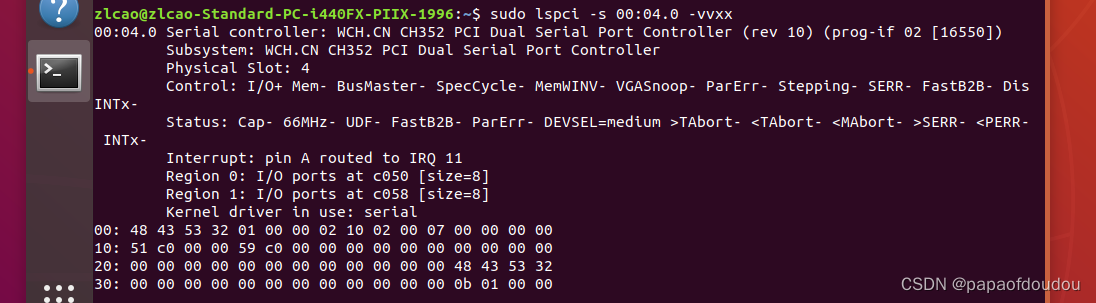
5. In the Linux guest VM, check the serial ports:
setserial -g /dev/ttyS*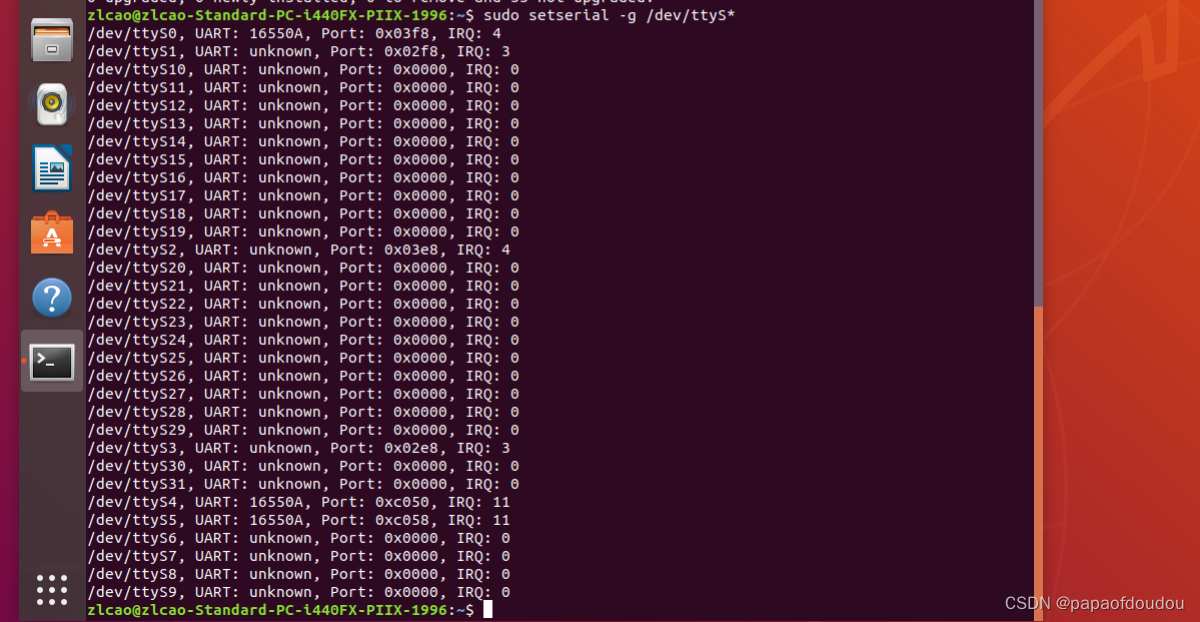
可以看到/dev/ttyS4, /dev/ttyS5即是模拟出来的串口设备。
6. Using minicom or any terminal emulation program, open port /dev/ttyS4 or /dev/ttyS5 with hardware flow control disabled.
7. Type data on the minicom terminal or send data to the terminal emulation program and read the data. Data is loop backed from hosts mtty driver.
8. Destroy the mediated device that you created:
echo 1 > /sys/bus/mdev/devices/83b8f4f2-509f-382f-3c1e-e6bfe0fa1001/remove