Spring boot - Task Execution and Scheduling @Async

SpringBoot的任务执行器
Spring Boot通过auto-configuration机制自动创建了任务执行器Task Execution,因此在SpringBoot项目中,你不需要任何配置、也不需要自己创建Task Execution就可以直接使用它。
Spring Boot通过auto-configuration机制创建的任务执行器有以下作用:
- asynchronous task execution (@EnableAsync):通过@EnableAsync以及@Async注解使用任务执行器。
- Spring for GraphQL’s asynchronous handling of Callable return values from controller methods(这个没用过)。
- Spring MVC’s asynchronous request processing:Spring MVC的异步请求处理。
- Spring WebFlux’s blocking execution support
除以上官网提到的,你还可以:手动使用任务执行器执行异步任务。
SpringBoot通过auto-configuration机制帮你创建了任务执行器TaskExecution,至于怎么通过TaskExecution、执行什么异步任务当然是你自己的事情了。
今天研究两部分内容:
- SpringBoot的auto-configuration机制创建任务执行器的过程。
- 通过任务执行器执行任务,主要是上述提到的官网内容第1项@EnableAsync以及@Async注解的原理及使用。
Spring Boot创建任务执行器
SpringBoot官网说的很明确,TaskExecutor通过SpringBoot的auto-configuration技术创建。我们知道SpringBoot的auto-configuration技术(详情请参考:SpringBoot 自动配置@EnableAutoConfiguration)是通过META-INF/spring.factories文件指定自动配置内容的,我们打开spring.factories文件找一下taskExecutor的相关内容,在EnableAutoConfiguration项下果然发现了TaskExecutionAutoConfiguration:
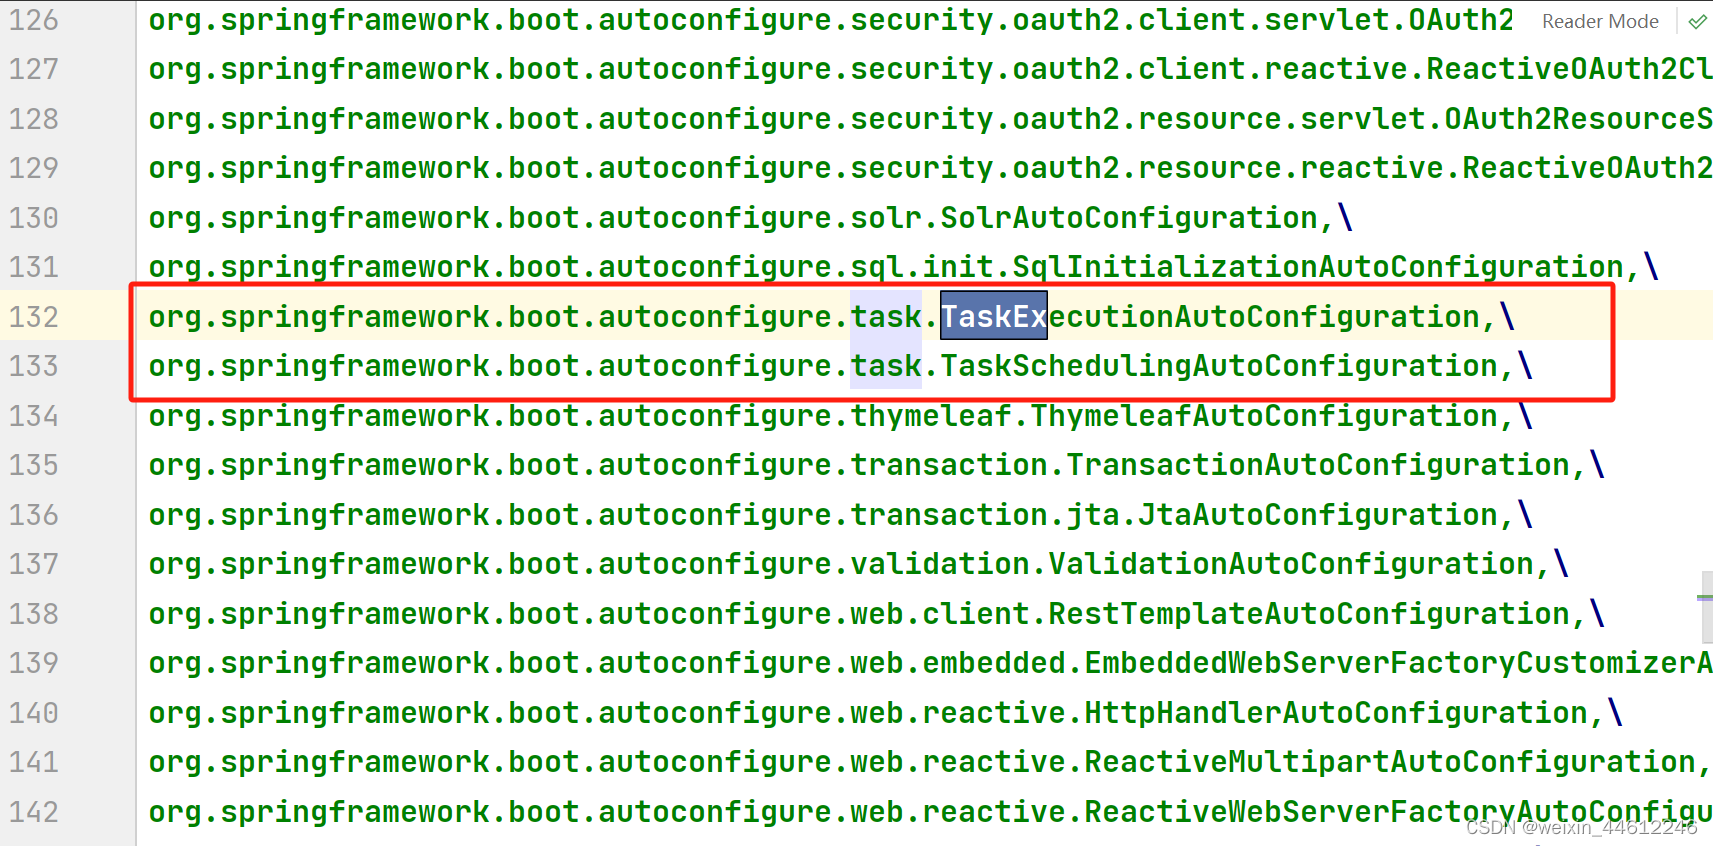
TaskExecutionAutoConfiguration在org.springframework.boot.autoconfigure.task包下,代码不算长,比较简单:
@ConditionalOnClass(ThreadPoolTaskExecutor.class)
@Configuration(proxyBeanMethods = false)
@EnableConfigurationProperties(TaskExecutionProperties.class)
public class TaskExecutionAutoConfiguration {/*** Bean name of the application {@link TaskExecutor}.*/public static final String APPLICATION_TASK_EXECUTOR_BEAN_NAME = "applicationTaskExecutor";@Bean@ConditionalOnMissingBeanpublic TaskExecutorBuilder taskExecutorBuilder(TaskExecutionProperties properties,ObjectProvider<TaskExecutorCustomizer> taskExecutorCustomizers,ObjectProvider<TaskDecorator> taskDecorator) {TaskExecutionProperties.Pool pool = properties.getPool();TaskExecutorBuilder builder = new TaskExecutorBuilder();builder = builder.queueCapacity(pool.getQueueCapacity());builder = builder.corePoolSize(pool.getCoreSize());builder = builder.maxPoolSize(pool.getMaxSize());builder = builder.allowCoreThreadTimeOut(pool.isAllowCoreThreadTimeout());builder = builder.keepAlive(pool.getKeepAlive());Shutdown shutdown = properties.getShutdown();builder = builder.awaitTermination(shutdown.isAwaitTermination());builder = builder.awaitTerminationPeriod(shutdown.getAwaitTerminationPeriod());builder = builder.threadNamePrefix(properties.getThreadNamePrefix());builder = builder.customizers(taskExecutorCustomizers.orderedStream()::iterator);builder = builder.taskDecorator(taskDecorator.getIfUnique());return builder;}@Lazy@Bean(name = { APPLICATION_TASK_EXECUTOR_BEAN_NAME,AsyncAnnotationBeanPostProcessor.DEFAULT_TASK_EXECUTOR_BEAN_NAME })@ConditionalOnMissingBean(Executor.class)public ThreadPoolTaskExecutor applicationTaskExecutor(TaskExecutorBuilder builder) {return builder.build();}}
它当然是一个Configuration类,在SpringBoot启动的过程@Bean注解指定的方法会被加载到Spring IoC容器中。其次,通过@EnableConfigurationProperties指定了配置类TaskExecutionProperties。
被加载到Ioc容器中的有两个对象:一个是通过taskExecutorBuilder方法加载的TaskExecutorBuilder,另外一个是通过applicationTaskExecutor方法加载的ThreadPoolTaskExecutor。
分别看一下。
TaskExecutorBuilder的创建
TaskExecutor构建器,在applicationTaskExecutor方法中负责构建TaskExecutor。
taskExecutorBuilder方法会接收一个参数TaskExecutionProperties ,用来指定TaskExecutor的各属性,比如queueCapacity、coreSize、keepAlive等等线程池相关参数,线程池相关内容请参考:线程池 - ThreadPoolExecutor源码分析。
简单看一眼TaskExecutionProperties类:
@ConfigurationProperties("spring.task.execution")
public class TaskExecutionProperties {private final Pool pool = new Pool();private final Shutdown shutdown = new Shutdown();/*** Prefix to use for the names of newly created threads.*/private String threadNamePrefix = "task-";public Pool getPool() {return this.pool;}public Shutdown getShutdown() {return this.shutdown;}public String getThreadNamePrefix() {return this.threadNamePrefix;}public void setThreadNamePrefix(String threadNamePrefix) {this.threadNamePrefix = threadNamePrefix;}public static class Pool {/*** Queue capacity. An unbounded capacity does not increase the pool and therefore* ignores the "max-size" property.*/private int queueCapacity = Integer.MAX_VALUE;/*** Core number of threads.*/private int coreSize = 8;/*** Maximum allowed number of threads. If tasks are filling up the queue, the pool* can expand up to that size to accommodate the load. Ignored if the queue is* unbounded.*/private int maxSize = Integer.MAX_VALUE;/*** Whether core threads are allowed to time out. This enables dynamic growing and* shrinking of the pool.*/private boolean allowCoreThreadTimeout = true;/*** Time limit for which threads may remain idle before being terminated.*/private Duration keepAlive = Duration.ofSeconds(60);public int getQueueCapacity() {return this.queueCapacity;}public void setQueueCapacity(int queueCapacity) {this.queueCapacity = queueCapacity;}public int getCoreSize() {return this.coreSize;}public void setCoreSize(int coreSize) {this.coreSize = coreSize;}public int getMaxSize() {return this.maxSize;}public void setMaxSize(int maxSize) {this.maxSize = maxSize;}public boolean isAllowCoreThreadTimeout() {return this.allowCoreThreadTimeout;}public void setAllowCoreThreadTimeout(boolean allowCoreThreadTimeout) {this.allowCoreThreadTimeout = allowCoreThreadTimeout;}public Duration getKeepAlive() {return this.keepAlive;}public void setKeepAlive(Duration keepAlive) {this.keepAlive = keepAlive;}}
正是@EnableConfigurationProperties以及@ConfigurationProperties注解决定了我们可以在配置文件(比如application.yml)中指定TaskExecutionProperties中的这些有关线程池的参数。
接收到这些配置参数之后,使用配置参数创建TaskExecutorBuilder,交给Spring Ioc容器。
ThreadPoolTaskExecutor 的创建
applicationTaskExecutor方法通过上面创建出来的TaskExecutorBuilder的build方法创建。
TaskExecutorBuilderd的build方法:
public ThreadPoolTaskExecutor build() {return configure(new ThreadPoolTaskExecutor());}
new了一个ThreadPoolTaskExecutor对象,调用configure方法:
public <T extends ThreadPoolTaskExecutor> T configure(T taskExecutor) {PropertyMapper map = PropertyMapper.get().alwaysApplyingWhenNonNull();map.from(this.queueCapacity).to(taskExecutor::setQueueCapacity);map.from(this.corePoolSize).to(taskExecutor::setCorePoolSize);map.from(this.maxPoolSize).to(taskExecutor::setMaxPoolSize);map.from(this.keepAlive).asInt(Duration::getSeconds).to(taskExecutor::setKeepAliveSeconds);map.from(this.allowCoreThreadTimeOut).to(taskExecutor::setAllowCoreThreadTimeOut);map.from(this.awaitTermination).to(taskExecutor::setWaitForTasksToCompleteOnShutdown);map.from(this.awaitTerminationPeriod).as(Duration::toMillis).to(taskExecutor::setAwaitTerminationMillis);map.from(this.threadNamePrefix).whenHasText().to(taskExecutor::setThreadNamePrefix);map.from(this.taskDecorator).to(taskExecutor::setTaskDecorator);if (!CollectionUtils.isEmpty(this.customizers)) {this.customizers.forEach((customizer) -> customizer.customize(taskExecutor));}return taskExecutor;}
将配置文件传递过来的参数传递给创建出来的ThreadPoolTaskExecutor对象并返回。
不配置的情况下,线程池默认参数在TaskExecutionProperties中指定:
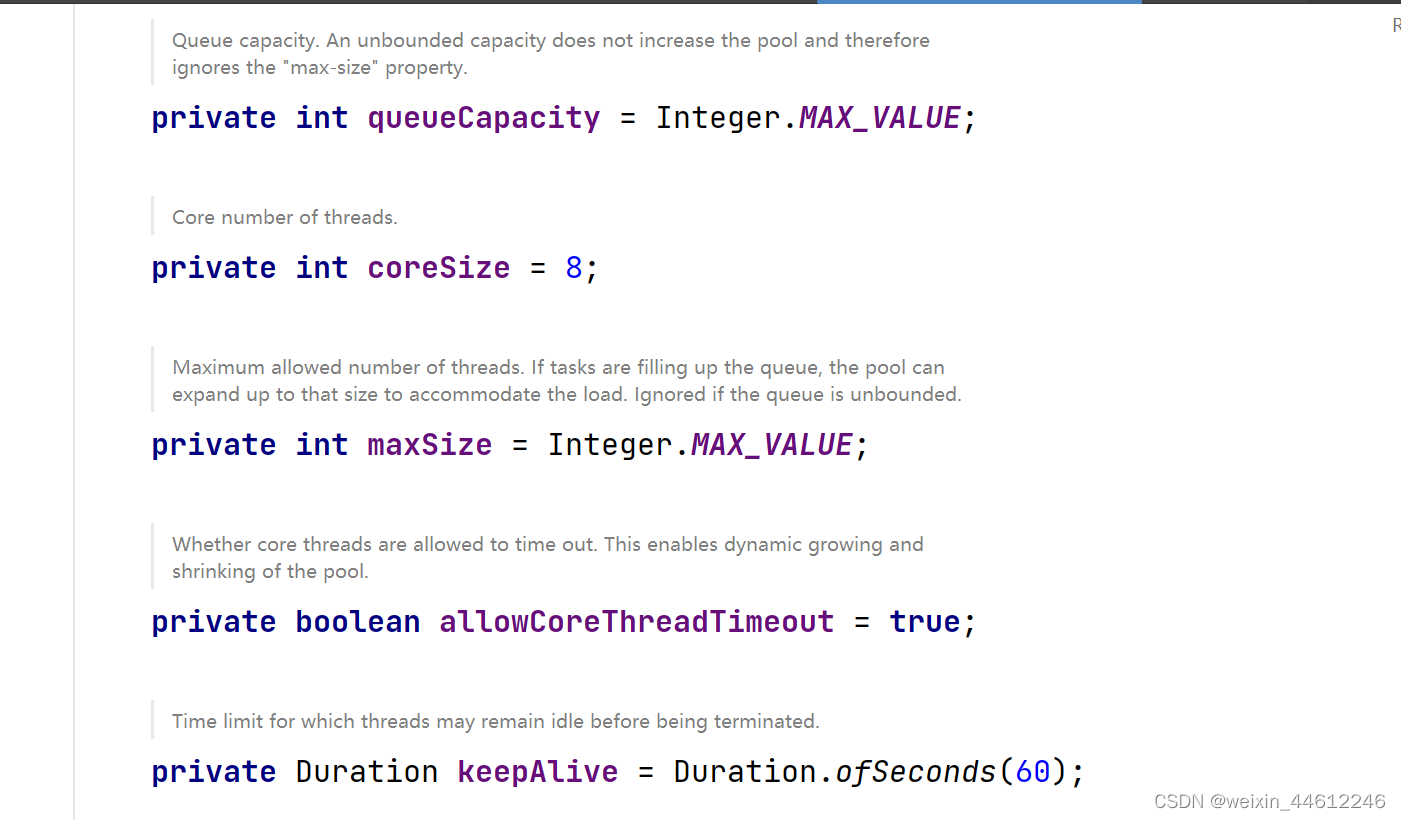
ThreadPoolTaskExecutor创建完成!
TaskExecutor的使用
既然Spring Boot已经帮助我们完成了TaskExecutor的创建并注入了Spring Ioc容器中,接下来我们就看一下该怎么使用它。
首先要尝试的是“手动使用”,不使用Spring的注解、而是想办法在代码中直接从Spring容器中获取到TaskExecutor之后调用他的execute方法。
首先创建一个Spring Boot项目,不需要什么特殊功能,pom文件也很简单,引入spring-web即可:
<?xml version="1.0" encoding="UTF-8"?>
<project xmlns="http://maven.apache.org/POM/4.0.0" xmlns:xsi="http://www.w3.org/2001/XMLSchema-instance"xsi:schemaLocation="http://maven.apache.org/POM/4.0.0 https://maven.apache.org/xsd/maven-4.0.0.xsd"><modelVersion>4.0.0</modelVersion><parent><groupId>org.springframework.boot</groupId><artifactId>spring-boot-starter-parent</artifactId><version>2.6.5</version>
<!--        <version>3.1.4</version>--><relativePath/> <!-- lookup parent from repository --></parent><groupId>com.example</groupId><artifactId>springbootstart</artifactId><version>0.0.1-SNAPSHOT</version><name>springbootstart</name><description>springbootstart</description><properties><java.version>17</java.version></properties><dependencies><dependency><groupId>org.springframework.boot</groupId><artifactId>spring-boot-starter-web</artifactId></dependency><dependency><groupId>org.projectlombok</groupId><artifactId>lombok</artifactId><optional>true</optional></dependency><dependency><groupId>org.springframework.boot</groupId><artifactId>spring-boot-starter-test</artifactId><scope>test</scope></dependency></dependencies><build><plugins><plugin><groupId>org.springframework.boot</groupId><artifactId>spring-boot-maven-plugin</artifactId><configuration><excludes><exclude><groupId>org.projectlombok</groupId><artifactId>lombok</artifactId></exclude></excludes></configuration></plugin></plugins></build></project>
然后,创建一个userService:
@Service
@Slf4j
public class UserService {@Autowiredprivate TaskExecutor taskExecutor;public void test2(){taskExecutor.execute(()->{log.info("this is userservice test2 start...");try{Thread.sleep(10000);}catch (Exception e){}log.info("This is userService' test2 end...");});}
}
userService非常简单,比较重要的是:
@Autowiredprivate TaskExecutor taskExecutor;
这行代码通过@Autowired自动装配一个TaskExecutor 对象,因为我们从前面对Spring Boot代码的分析,Spring Boot应该是在启动的过程中已经通过auto-configuration机制自动创建并注入了TaskExecutor,所以按道理我们是可以通过自动装配的方式在userService中应用它的。
然后写一个test2方法,log看一下装配进来的taskExecutor到底是个啥对象,再调用taskExecutor的execute的方法模拟异步执行任务,执行前后打印log。
然后,写controller:
@RestController
@RequestMapping("/hello")
@Slf4j
public class HelloWorldController {public HelloWorldController(){}@Autowiredprivate UserService userService;@GetMapping ("/test2")public String test2(){userService.test2();log.info("after userservice test2 ...");return "hello";}
}
OK,代码准备好了,启动应用,测试。通过应用的端口号8002可以正常访问:
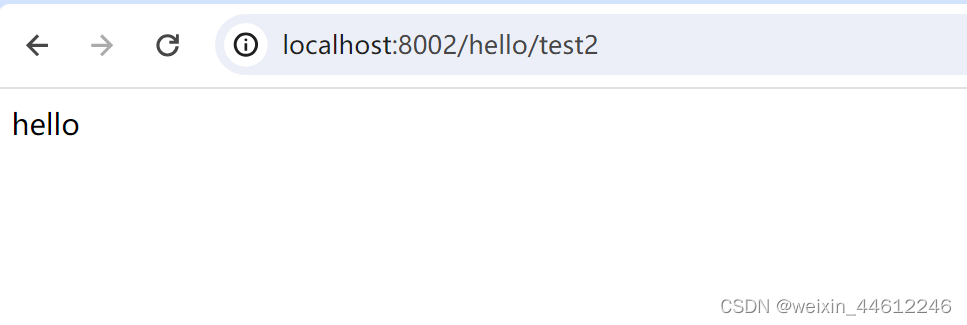
而且,结果可以立即返回,前台并不需要等待userService的test2方法中睡眠的10秒钟,说明睡眠的线程一定是通过taskExecutor调用起来的异步线程,taskExecutor一定是生效了。
后台log也说明确实如此:
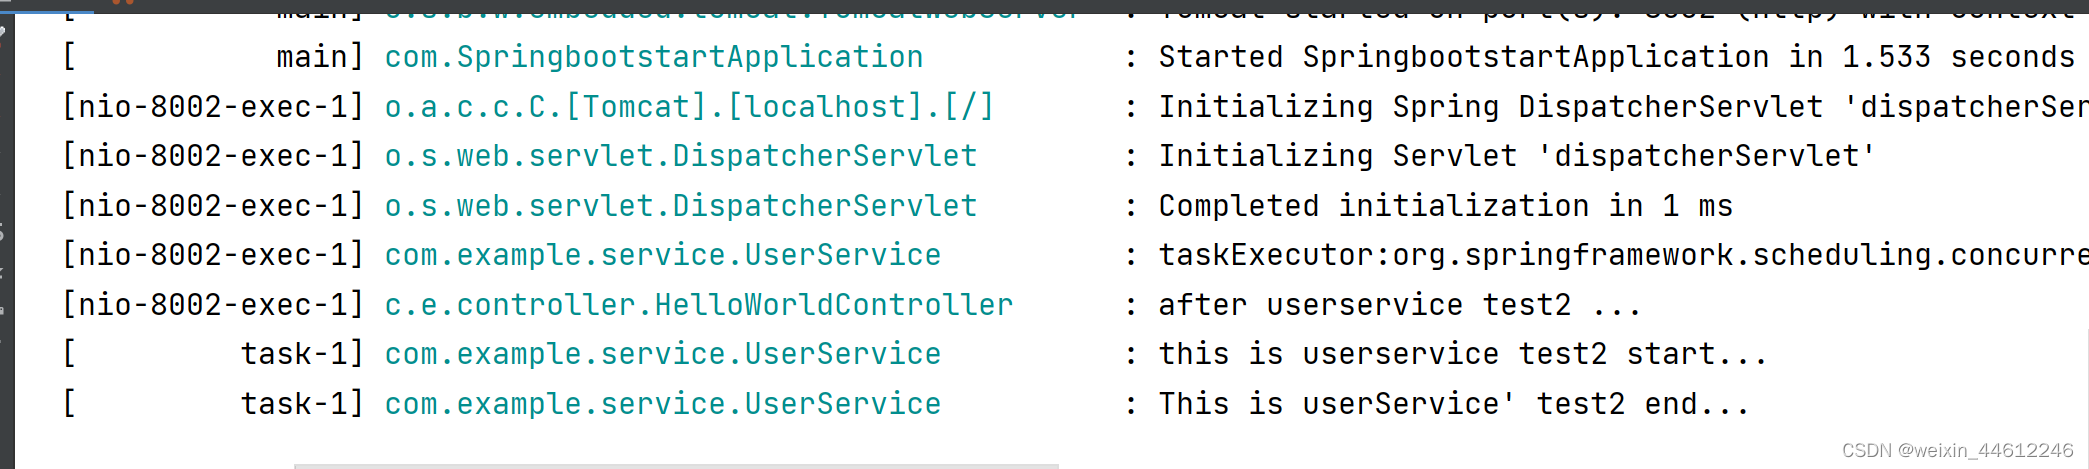
前面的log是前台调用接口、tomcat的线程nio-8002-exec-1打印的,之后taskExecutor启动了新线程task-1,后面的两行日志是线程task-1打印的。
@Async注解
自己写代码使用taskExecutor线程池启动新线程执行任务这种方式虽然行得通,但是太low太繁琐了,既然使用了Spring框架,我们当然不需要这么麻烦。Spring给我们提供了@Async注解。
@Async注解可以用在方法上,也可以用在类上,不管用在方法上、还是用在类上,都要求当前类必须是受Spring管理的bean,因为@Async注解是通过Spring的BeanPostProcessor机制生效的。
我们改造UserService类,再编写一个test方法:
@Asyncpublic void test(){log.info("This is userService' test start...");try {Thread.sleep(10000);}catch (Exception e){}log.info("This is userService' test end...");return;}
代码逻辑也非常简单,和test2方法一样,睡眠10秒后才返回结果。
重新启动应用后测试,发现@Async没有生效!
不生效的原因是缺少@EnableAsync注解,在启动类增加@EnableAsync注解后重新测试,发现@Async生效了,测试结果和test2的一样,所以也就不贴图了。
接下来的任务是,研究@EnableAsync注解的作用,为什么没有@EnableAsync注解的情况下,@Async注解不能生效。
@EnableAsync注解的底层原理
关于Spring的@Enablexxx注解,我们前面的文章分析过,基本就是通过@Configuration+@Import注解的联合使用达到注入指定对象到Spring IoC容器中。
先看@EnableAsync源码:
@Target(ElementType.TYPE)
@Retention(RetentionPolicy.RUNTIME)
@Documented
@Import(AsyncConfigurationSelector.class)
public @interface EnableAsync {
通过@Import注解引入AsyncConfigurationSelector类,继续跟踪AsyncConfigurationSelector代码:
public class AsyncConfigurationSelector extends AdviceModeImportSelector<EnableAsync> {private static final String ASYNC_EXECUTION_ASPECT_CONFIGURATION_CLASS_NAME ="org.springframework.scheduling.aspectj.AspectJAsyncConfiguration";/*** Returns {@link ProxyAsyncConfiguration} or {@code AspectJAsyncConfiguration}* for {@code PROXY} and {@code ASPECTJ} values of {@link EnableAsync#mode()},* respectively.*/@Override@Nullablepublic String[] selectImports(AdviceMode adviceMode) {switch (adviceMode) {case PROXY:return new String[] {ProxyAsyncConfiguration.class.getName()};case ASPECTJ:return new String[] {ASYNC_EXECUTION_ASPECT_CONFIGURATION_CLASS_NAME};default:return null;}}}
扩展了AdviceModeImportSelector类,而AdviceModeImportSelector类实现了ImportSelector接口,而ImportSelector接口这种方式最终是通过他的方法selectImports来实现注入的(这部分可以参考 SpringBoot 自动配置@EnableAutoConfiguration)。
selectImports方法根据adviceMode(默认是PROXY)会引入ProxyAsyncConfiguration类:
@Configuration(proxyBeanMethods = false)
@Role(BeanDefinition.ROLE_INFRASTRUCTURE)
public class ProxyAsyncConfiguration extends AbstractAsyncConfiguration {@Bean(name = TaskManagementConfigUtils.ASYNC_ANNOTATION_PROCESSOR_BEAN_NAME)@Role(BeanDefinition.ROLE_INFRASTRUCTURE)public AsyncAnnotationBeanPostProcessor asyncAdvisor() {Assert.notNull(this.enableAsync, "@EnableAsync annotation metadata was not injected");AsyncAnnotationBeanPostProcessor bpp = new AsyncAnnotationBeanPostProcessor();bpp.configure(this.executor, this.exceptionHandler);Class<? extends Annotation> customAsyncAnnotation = this.enableAsync.getClass("annotation");if (customAsyncAnnotation != AnnotationUtils.getDefaultValue(EnableAsync.class, "annotation")) {bpp.setAsyncAnnotationType(customAsyncAnnotation);}bpp.setProxyTargetClass(this.enableAsync.getBoolean("proxyTargetClass"));bpp.setOrder(this.enableAsync.<Integer>getNumber("order"));return bpp;}}
ProxyAsyncConfiguration 是一个配置类,会通过@Bean注解注入一个叫AsyncAnnotationBeanPostProcessor 的BeanPostProcessor。从类名称我们就可以猜测到@Async注解就是通过这个后置处理器进行处理的。
接下来的代码跟踪还是稍稍有点复杂的。
首先,AsyncAnnotationBeanPostProcessor 通过父类AbstractBeanFactoryAwareAdvisingPostProcessor实现了BeanFactoryAware接口,所以我们知道他的setBeanFactory方法在Spring的Bean创建过程中会被回调:
@Overridepublic void setBeanFactory(BeanFactory beanFactory) {super.setBeanFactory(beanFactory);AsyncAnnotationAdvisor advisor = new AsyncAnnotationAdvisor(this.executor, this.exceptionHandler);if (this.asyncAnnotationType != null) {advisor.setAsyncAnnotationType(this.asyncAnnotationType);}advisor.setBeanFactory(beanFactory);this.advisor = advisor;}
setBeanFactory方法中会创建一个advisor类AsyncAnnotationAdvisor,从名字中我们又可以猜测到,@Async注解最终应该会通过AOP技术实现。
继续跟踪AsyncAnnotationAdvisor源码,构造器:
public AsyncAnnotationAdvisor(@Nullable Supplier<Executor> executor, @Nullable Supplier<AsyncUncaughtExceptionHandler> exceptionHandler) {Set<Class<? extends Annotation>> asyncAnnotationTypes = new LinkedHashSet<>(2);asyncAnnotationTypes.add(Async.class);try {asyncAnnotationTypes.add((Class<? extends Annotation>)ClassUtils.forName("javax.ejb.Asynchronous", AsyncAnnotationAdvisor.class.getClassLoader()));}catch (ClassNotFoundException ex) {// If EJB 3.1 API not present, simply ignore.}this.advice = buildAdvice(executor, exceptionHandler);this.pointcut = buildPointcut(asyncAnnotationTypes);}
调用buildAdvice和buildPointcut,创建切面和切点:
protected Advice buildAdvice(@Nullable Supplier<Executor> executor, @Nullable Supplier<AsyncUncaughtExceptionHandler> exceptionHandler) {AnnotationAsyncExecutionInterceptor interceptor = new AnnotationAsyncExecutionInterceptor(null);interceptor.configure(executor, exceptionHandler);return interceptor;}
构造切面的方法会创建一个AnnotationAsyncExecutionInterceptor 类,回忆一下AOP相关知识,我们知道Pointcut满足的情况下会调用切面类的invoke方法。
构造Pointcut的方法源码我们就不再跟踪了,可以猜测到他的匹配逻辑应该是检查当前方法(或者当前类)是否有@Async注解。
接下来我们就继续跟踪AnnotationAsyncExecutionInterceptor 类。
AnnotationAsyncExecutionInterceptor继承自父类AsyncExecutionInterceptor,invoke方法在他父类AsyncExecutionInterceptor中。
public Object invoke(final MethodInvocation invocation) throws Throwable {Class<?> targetClass = (invocation.getThis() != null ? AopUtils.getTargetClass(invocation.getThis()) : null);Method specificMethod = ClassUtils.getMostSpecificMethod(invocation.getMethod(), targetClass);final Method userDeclaredMethod = BridgeMethodResolver.findBridgedMethod(specificMethod);AsyncTaskExecutor executor = determineAsyncExecutor(userDeclaredMethod);if (executor == null) {throw new IllegalStateException("No executor specified and no default executor set on AsyncExecutionInterceptor either");}Callable<Object> task = () -> {try {Object result = invocation.proceed();if (result instanceof Future) {return ((Future<?>) result).get();}}catch (ExecutionException ex) {handleError(ex.getCause(), userDeclaredMethod, invocation.getArguments());}catch (Throwable ex) {handleError(ex, userDeclaredMethod, invocation.getArguments());}return null;};return doSubmit(task, executor, invocation.getMethod().getReturnType());}
invoke方法就是实现异步调用的地方!
首先会通过determineAsyncExecutor方法获取taskExecutor,这也是我们关心的地方,不过我们先放放,先看一下拿到TaskExecutor之后的处理逻辑。
代码并不复杂,lamda方式创建一个callable任务,通过invocation.proceed()执行原方法。
通过doSubmit方法、使用TaskExecutor启动新的线程调用task任务、完成对原方法的执行!
主要代码跟踪完毕。
最后,再来看一下determineAsyncExecutor方法:
protected AsyncTaskExecutor determineAsyncExecutor(Method method) {AsyncTaskExecutor executor = this.executors.get(method);if (executor == null) {Executor targetExecutor;String qualifier = getExecutorQualifier(method);if (StringUtils.hasLength(qualifier)) {targetExecutor = findQualifiedExecutor(this.beanFactory, qualifier);}else {targetExecutor = this.defaultExecutor.get();}if (targetExecutor == null) {return null;}executor = (targetExecutor instanceof AsyncListenableTaskExecutor ?(AsyncListenableTaskExecutor) targetExecutor : new TaskExecutorAdapter(targetExecutor));this.executors.put(method, executor);}return executor;}
总体的逻辑就是,通过beanFactory从Spring Ioc容器中获取TaskExecutor,首先判断是否有QualifiedExecutor,有的话通过findQualifiedExecutor方法从容器中获取QualifiedExecutor,没有的话通过this.defaultExecutor.get()获取。
this.defaultExecutor.get()的业务逻辑需要基于接口AsyncConfigurer来解释:
public interface AsyncConfigurer {/*** The {@link Executor} instance to be used when processing async* method invocations.*/@Nullabledefault Executor getAsyncExecutor() {return null;}/*** The {@link AsyncUncaughtExceptionHandler} instance to be used* when an exception is thrown during an asynchronous method execution* with {@code void} return type.*/@Nullabledefault AsyncUncaughtExceptionHandler getAsyncUncaughtExceptionHandler() {return null;}}
AsyncConfigurer 接口有两个方法,一个用来获取Executor,一个用来获取AsyncUncaughtExceptionHandler。
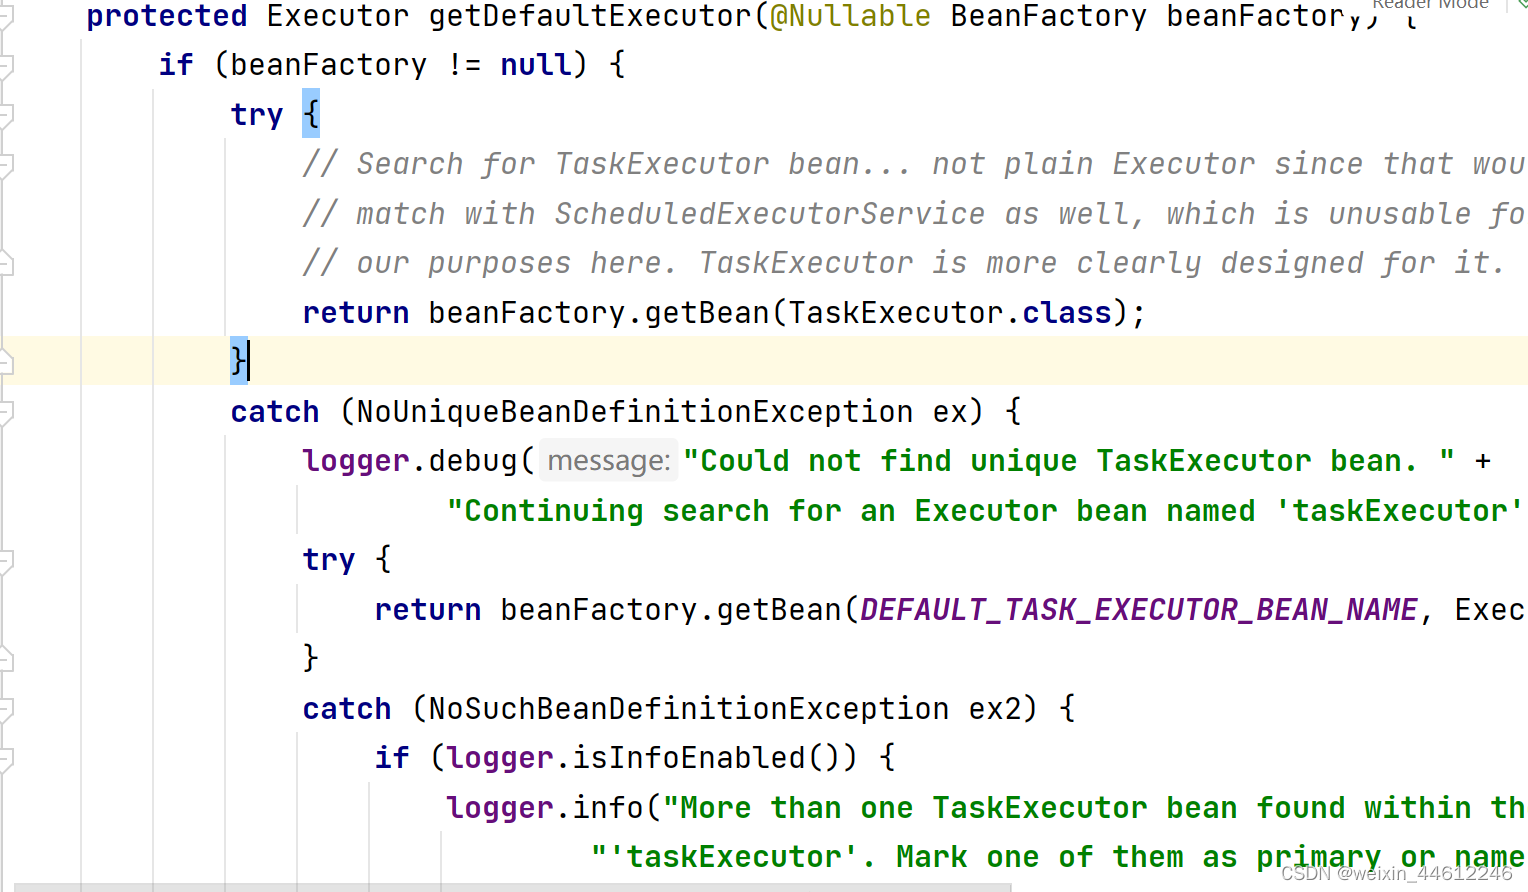
this.defaultExecutor.get()的业务逻辑大概可以概括为:如果应用实现了AsyncConfigurer接口,则通过该接口获取Executor,否则,如果没有提供AsyncConfigurer的实现类,则向Spring Ioc容器获取默认的TaskExecutor:
OK,Thanks a lot!