Influx集群解决方案(Influx Proxy篇)
)
InFluxDB 集群搭建
本次搭建使用influx proxy
介绍
github地址:https://github.com/chengshiwen/influx-proxy/
Influx Proxy 是一个基于高可用、一致性哈希的 InfluxDB 集群代理服务,实现了 InfluxDB 高可用集群的部署方案,
具有动态扩/缩容、故障恢复、数据同步等能力。连接到 Influx Proxy 和连接原生的 InfluxDB Server 没有显著区别
(支持的查询语句列表),对上层客户端是透明的,上层应用可以像使用单机的 InfluxDB 一样使用,Influx Proxy
会处理请求的转发,并对各个 InfluxDB 集群节点进行管理。Influx Proxy 基于饿了么开源的 Influx-Proxy,
并进一步开发和优化,支持了更多的特性,移除了 Python、Redis 依赖,解决了受限于一个数据库、需要额外配置
KEYMAPS 、数据负载不均衡的问题。
架构说明
-
在改造我们的系统中我们相当于要实现以下步骤
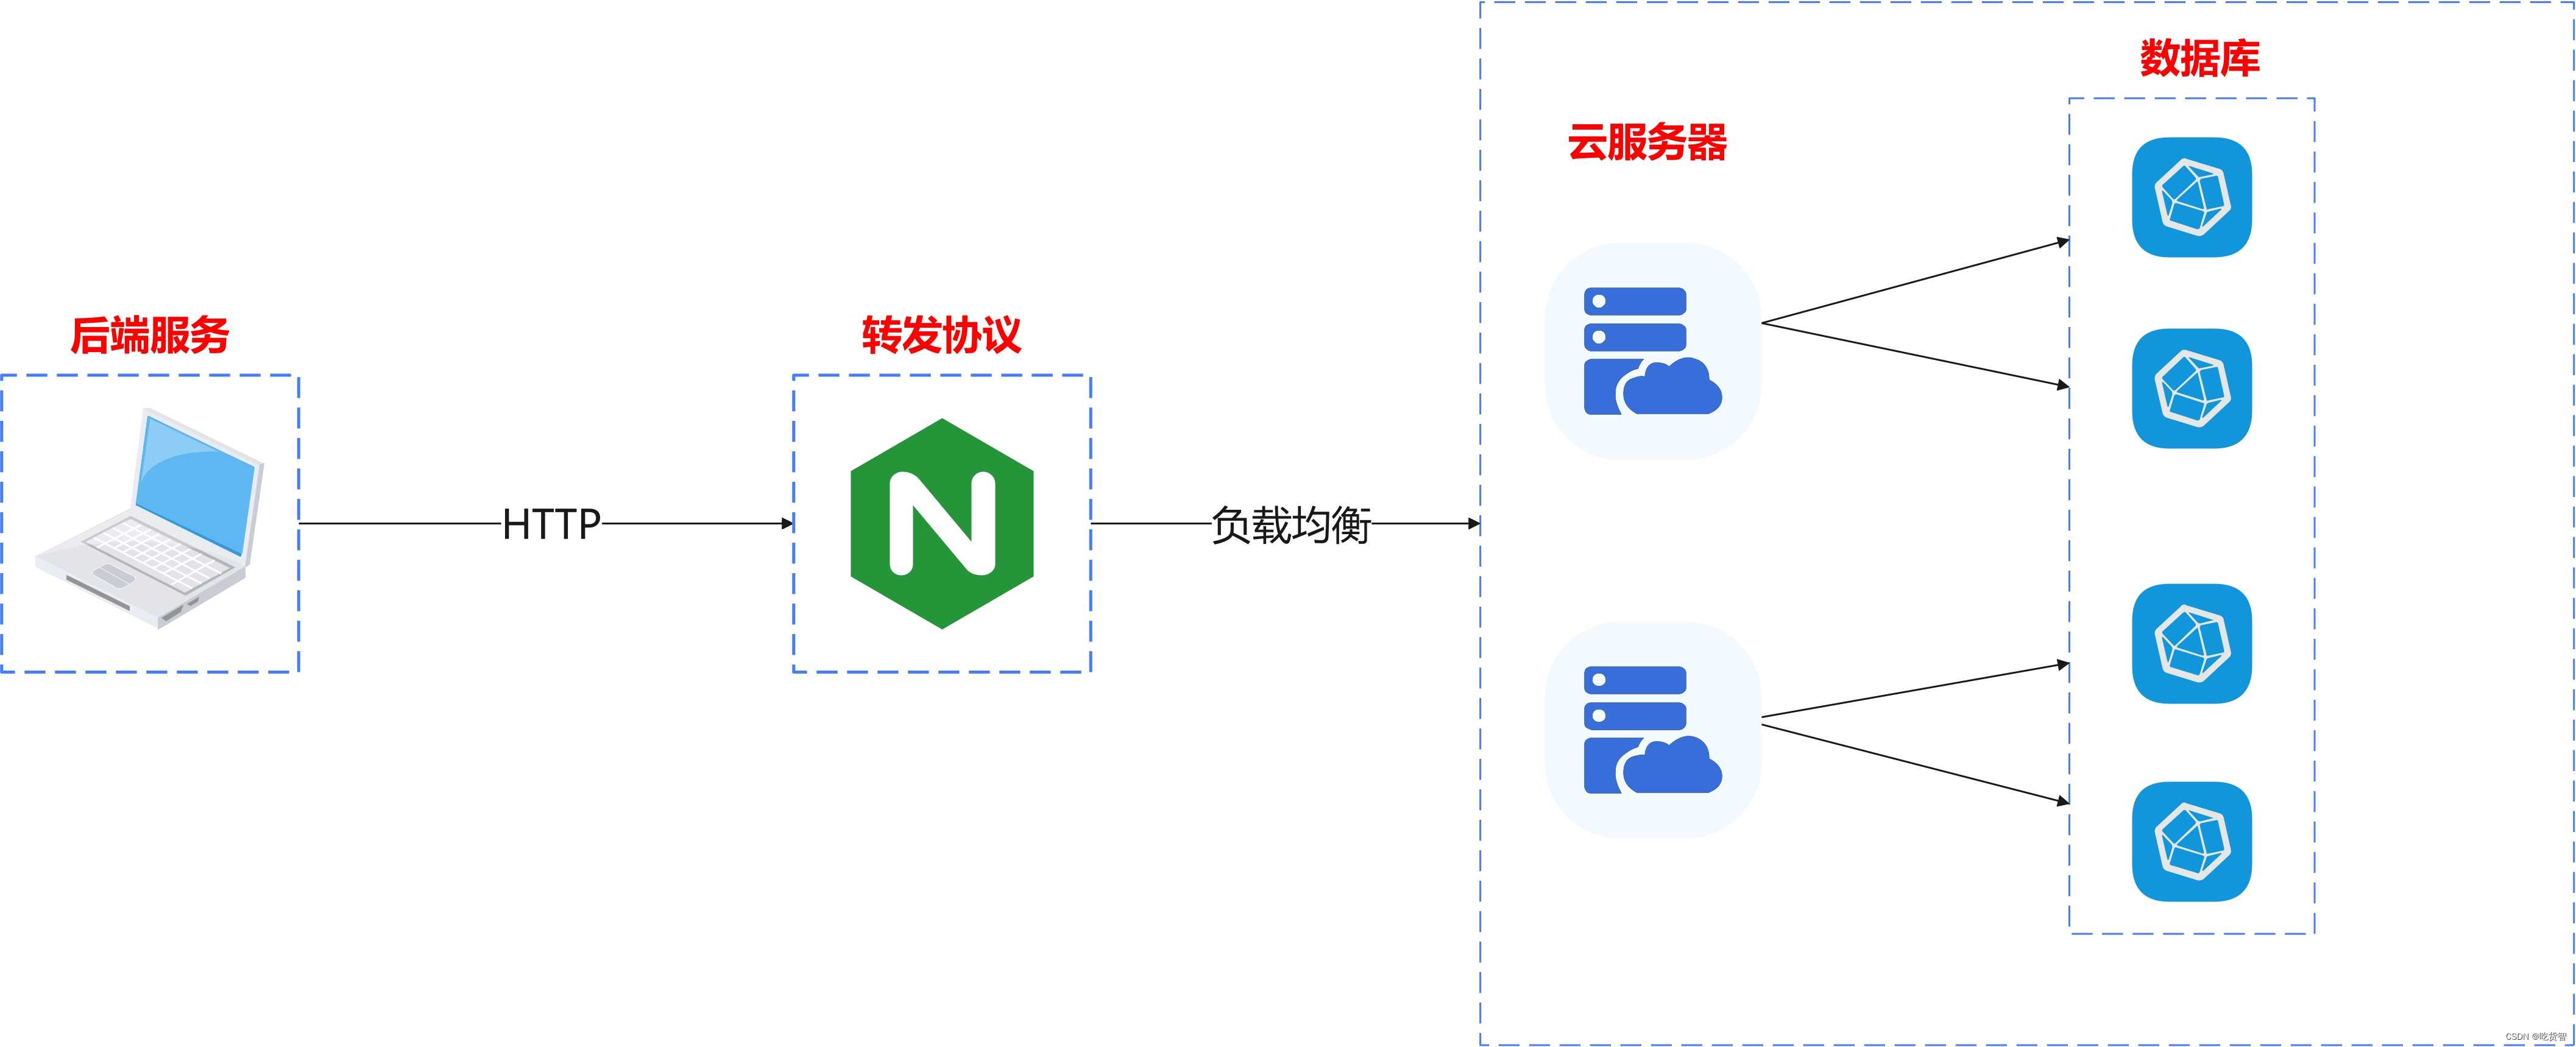
实现步骤
Influx1.8环境
Influx1.8+Influx Proxy +SpringBoot +Ngnix
SpringBoot搭建
-
引入依赖
<dependency><groupId>org.influxdb</groupId><artifactId>influxdb-java</artifactId><version>2.6</version> </dependency> -
java代码(参考https://github.com/influxdata/influxdb-java)
// Create an object to handle the communication with InfluxDB.
// (best practice tip: reuse the 'influxDB' instance when possible)
final String serverURL = "http://127.0.0.1:8086", username = "root", password = "root";
final InfluxDB influxDB = InfluxDBFactory.connect(serverURL, username, password);// Create a database...
// https://docs.influxdata.com/influxdb/v1.7/query_language/database_management/
String databaseName = "NOAA_water_database";
influxDB.query(new Query("CREATE DATABASE " + databaseName));
influxDB.setDatabase(databaseName);// ... and a retention policy, if necessary.
// https://docs.influxdata.com/influxdb/v1.7/query_language/database_management/
String retentionPolicyName = "one_day_only";
influxDB.query(new Query("CREATE RETENTION POLICY " + retentionPolicyName+ " ON " + databaseName + " DURATION 1d REPLICATION 1 DEFAULT"));
influxDB.setRetentionPolicy(retentionPolicyName);// Enable batch writes to get better performance.
influxDB.enableBatch(BatchOptions.DEFAULTS.threadFactory(runnable -> {Thread thread = new Thread(runnable);thread.setDaemon(true);return thread;})
);// Close it if your application is terminating or you are not using it anymore.
Runtime.getRuntime().addShutdownHook(new Thread(influxDB::close));// Write points to InfluxDB.
influxDB.write(Point.measurement("h2o_feet").time(System.currentTimeMillis(), TimeUnit.MILLISECONDS).tag("location", "santa_monica").addField("level description", "below 3 feet").addField("water_level", 2.064d).build());influxDB.write(Point.measurement("h2o_feet").time(System.currentTimeMillis(), TimeUnit.MILLISECONDS).tag("location", "coyote_creek").addField("level description", "between 6 and 9 feet").addField("water_level", 8.12d).build());// Wait a few seconds in order to let the InfluxDB client
// write your points asynchronously (note: you can adjust the
// internal time interval if you need via 'enableBatch' call).
Thread.sleep(5_000L);// Query your data using InfluxQL.
// https://docs.influxdata.com/influxdb/v1.7/query_language/data_exploration/#the-basic-select-statement
QueryResult queryResult = influxDB.query(new Query("SELECT * FROM h2o_feet"));System.out.println(queryResult);
// It will print something like:
// QueryResult [results=[Result [series=[Series [name=h2o_feet, tags=null,
//      columns=[time, level description, location, water_level],
//      values=[
//         [2020-03-22T20:50:12.929Z, below 3 feet, santa_monica, 2.064],
//         [2020-03-22T20:50:12.929Z, between 6 and 9 feet, coyote_creek, 8.12]
//      ]]], error=null]], error=null]
Ngnix搭建(搭建中)
请参考 custom.conf
服务器搭建与数据库部署
使用docker来搭建对应的influxdb信息
本地存在两台服务器(请确保influx1可以访问到influx2 同一局域网)
influx1: 192.168.137.130
influx2: 192.168.137.131
-
docker-compose代码
version: "3.5"services:influx-proxy:image: chengshiwen/influx-proxy:latestcontainer_name: influx-proxyports:- 7076:7076environment:- TZ=Asia/Shanghaivolumes:- ./proxy.json:/etc/influx-proxy/proxy.jsonrestart: unless-stoppednetworks:- influx_netinfluxdb-1:image: influxdb:1.8container_name: influxdb-1restart: unless-stoppednetworks:- influx_netvolumes:- ./influxdb1/influxdb.conf:/etc/influxdb/influxdb.conf- ./influxdb1/meta:/var/lib/influxdb/meta- ./influxdb1/data:/var/lib/influxdb/data- ./influxdb1/wal:/var/lib/influxdb/walports:- "8086:8086"command: ["influxd", "--config", "/etc/influxdb/influxdb.conf"]influxdb-2:image: influxdb:1.8container_name: influxdb-2restart: unless-stoppednetworks:- influx_netvolumes:- ./influxdb2/influxdb.conf:/etc/influxdb/influxdb.conf- ./influxdb2/meta:/var/lib/influxdb/meta- ./influxdb2/data:/var/lib/influxdb/data- ./influxdb2/wal:/var/lib/influxdb/walports:- "8087:8086"command: ["influxd", "--config", "/etc/influxdb/influxdb.conf"]networks:influx_net: -
proxy.json代码
{"circles": [{"name": "circle-1","backends": [{"name": "influxdb-1-1","url": "http://192.168.137.130:8086","username": "","password": ""},{"name": "influxdb-1-2","url": "http://192.168.137.130:8087","username": "","password": ""}]},{"name": "circle-2","backends": [{"name": "influxdb-2-1","url": "http://192.168.137.131:8086","username": "","password": ""},{"name": "influxdb-2-2","url": "http://192.168.137.131:8087","username": "","password": ""}]}],"listen_addr": ":7076","db_list": [],"data_dir": "data","tlog_dir": "log","hash_key": "idx","flush_size": 10000,"flush_time": 1,"check_interval": 1,"rewrite_interval": 10,"conn_pool_size": 20,"write_timeout": 10,"idle_timeout": 10,"username": "","password": "","write_tracing": false,"query_tracing": false,"pprof_enabled": false,"https_enabled": false,"https_cert": "","https_key": "" } -
influx.conf配置
#这里只放出几处需要修改的 其他按照默认即可 如果生产环境可以考虑把internal禁掉# Determines whether the Flux query endpoint is enabled.flux-enabled = true (如果需要支持flux语句 请设置为true) -
测试
curl -XPOST 'http://127.0.0.1:7076/query' --data-urlencode 'q=CREATE DATABASE "testdb"'
sudo curl -XPOST 'http://127.0.0.1:7076/api/v2/write?bucket=testdb&precision=s' --data-binary 'mem,host=host1 used_percent=25 1700469476'
sudo curl -XPOST 'http://127.0.0.1:7076/api/v2/write?bucket=testdb&precision=s' --data-binary 'mem2,host=host2 used_percent=23 1700469476'
sudo curl -XPOST 'http://127.0.0.1:7076/api/v2/write?bucket=testdb&precision=s' --data-binary 'mem3,host=host3 used_percent=24 1700531670'sudo curl -XPOST 'http://127.0.0.1:7076/api/v2/query' \-H 'Accept:application/csv' \-H 'Content-type:application/vnd.flux' \-d 'from(bucket:"testdb")|> range(start:-5m)|> filter(fn:(r) => r._measurement == "mem")'
Influx2.5环境
SpringBoot搭建
-
引入依赖
<dependency><groupId>com.influxdb</groupId><artifactId>influxdb-client-java</artifactId><version>6.3.0</version> </dependency> -
Java代码
public class influxProxyTest {public static void main(String[] args) {String url = "http://192.168.137.130:7076";String token = "testinfo";String org = "admin";String bucket = "analyse";InfluxDBClient client = InfluxDBClientFactory.create(url, token.toCharArray(), org, bucket);QueryApi queryApi = client.getQueryApi();String flux = "from(bucket:\"analyse\")\n" +"|> range(start:-5d)\n" +"|> filter(fn:(r) => r._measurement == \"mem\")";List<FluxTable> list = queryApi.query(flux, org);for (FluxTable fluxTable:list){List<FluxRecord> records = fluxTable.getRecords();for (FluxRecord fluxRecord:records){System.out.println(fluxRecord.getValue());}}}
Ngnix搭建(实现中)
请参考 custom.conf
服务器搭建与数据库部署
使用docker来搭建对应的influxdb信息
本地存在两台服务器(请确保influx1可以访问到influx2 同一局域网)
influx1: 192.168.137.130
influx2: 192.168.137.131
-
docker-compose代码
version: "3.5"services:influx-proxy:image: chengshiwen/influx-proxy:3.0.0-previewcontainer_name: influx-proxyports:- 7076:7076environment:- TZ=Asia/Shanghaivolumes:- ./proxy.json:/etc/influx-proxy/proxy.jsonrestart: unless-stoppednetworks:- influx_netinfluxdb-1:image: influxdb:2.5.1container_name: influxdb-1restart: unless-stoppedports:- "8086:8086"networks:- influx_netvolumes:- ./influxdb1:/var/lib/influxdb2influxdb-2:image: influxdb:2.5.1container_name: influxdb-2restart: unless-stoppedports:- "8087:8086"networks:- influx_netvolumes:- ./influxdb2:/var/lib/influxdb2networks:influx_net: -
proxy.json代码
{"circles": [{"name": "circle-1","backends": [{"name": "influxdb-1-1","url": "http://192.168.137.130:8086","token": ""},{"name": "influxdb-1-2","url": "http://192.168.137.130:8087","token": ""}]},{"name": "circle-2","backends": [{"name": "influxdb-2-1","url": "http://192.168.137.131:8086","token": ""},{"name": "influxdb-2-2","url": "http://192.168.137.131:8087","token": ""}]}],"dbrp": {"separator": "/","mapping": {"mydb": "admin/analyse", "mydb/myrp": "admin/analyse"}},"listen_addr": ":7076","data_dir": "data","flush_size": 10000,"flush_time": 1,"check_interval": 1,"rewrite_interval": 10,"conn_pool_size": 20,"write_timeout": 10,"write_tracing": false,"query_tracing": false,"token": "","pprof_enabled": false,"https_enabled": false,"https_cert": "","https_key": "" } -
测试
数据写入
sudo curl -XPOST 'http://192.168.137.130:7076/api/v2/write?org=admin&bucket=analyse&precision=s' --data-binary 'mem,host=host3 used_percent=241 1700531671'