[Linux] LVS负载均衡群集——DR模式
![[Linux] LVS负载均衡群集——DR模式](http://pic.xiahunao.cn/yaotu/[Linux] LVS负载均衡群集——DR模式)
一、 DR模式的特点
直接路由: 在LVS_DR模式下,负载均衡器不修改数据包的IP地址,只修改目的MAC地址。这使得数据包可以直接路由到后端实际服务器上,而不需要返回到负载均衡器。
高性能: 由于数据包在传输过程中不需要回到负载均衡器,LVS_DR模式具有较低的延迟,提供了高性能的负载均衡。
负载均衡器无状态: 在LVS_DR模式下,负载均衡器是无状态的,因为它不处理响应流量。这降低了负载均衡器的负担,使其更容易扩展和维护。
后端服务器真实IP: 客户端直接与后端实际服务器通信,因此客户端看到的是后端服务器的真实IP地址,而不是负载均衡器的IP地址。
ARP协议处理: 在LVS_DR模式下,负载均衡器需要处理ARP(地址解析协议)请求,以便将数据包正确路由到后端实际服务器。通常,负载均衡器会使用VIP(Virtual IP)来响应ARP请求。
二、LVS-DR模式工作过程
1. 客户端通过VIP将访问请求报文(源IP为客户端IP,目的IP为VIP)发送到调度器
2. 调度器通过调度算法选择最适合的节点服务器,并重新封装数据报文(将源MAC改为调度器的 MAC,目的MAC改为节点服务器的MAC地址),再通过交换机转发请求给节点服务器
3. 节点服务器收到请求报文后,确认目的MAC和目的IP无误后解包并送到应用层进行处理
4. 节点服务器在返回响应报文前,会先重新封装报文(源IP为VIP,目的为客户端IP),再将响应报文先通过lo接口传送给物理网卡,再通过物理网卡发送给客户端
三、LVS-DR模式部署过程
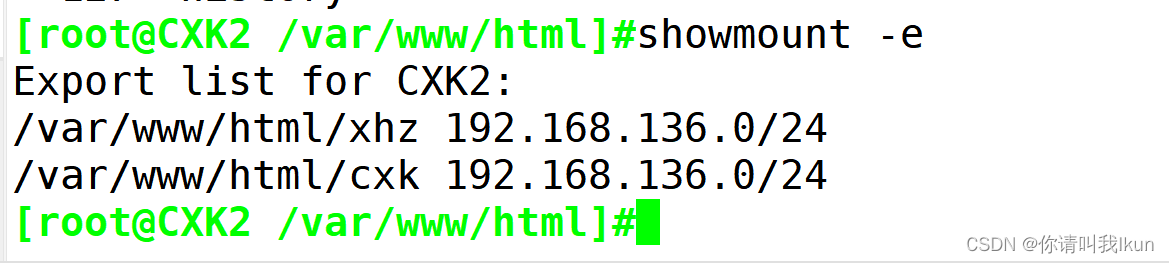
第一步:部署共享服务(主机IP:192.168.136.110)
95 systemctl stop firewalld.service96 systemctl disable firewalld.service97 setenforce 098 yum install nfs-utils rpcbind -y99 systemctl start rpcbind.service100 systemctl start nfs.service101 systemctl enable nfs.service102 systemctl enable rpcbind.service103 mkdir -p /var/www/html/{cxk,xhz}104 cd /var/www/html/105 ls106 echo 'this is cxk_web01!' >cxk/test.html107 echo 'this is xhz_web02!' >xhz/test.html108 cat cxk/test.html 109 cat xhz/test.html 110 vim /etc/exports111 systemctl enable --now rpcbind nfs112 showmount -e113 systemctl stop firewalld114 setenforce 0115 showmount -e116 systemctl enable --now rpcbind nfs117 showmount -e118 vim /etc/exports119 systemctl status rpcbind.service 120 systemctl status nfs121 showmount -e122 exportfs -a123 showmount -e

第二步:配置节点服务器(192.168.136.120 192.168.136.130)
两台web节点服务器相同的操作:
77 systemctl restart network.service78 systemctl disable --now firewalld79 setenforce 080 showmount -e 192.168.136.11081 cd /etc/yum.repos.d/82 ls83 mkdir bak84 mv *.repo bak85 rz -E86 ls87 yum -y install nginx88 vim /etc/fstab 89 mount -a90 df -h91 ls92 ls /usr/share/nginx/html/93 cat te94 ls /usr/share/nginx/html/95 cat /usr/share/nginx/html/test.html 96 vim /etc/nginx/nginx.conf 97 systemctl restart nginx98 vim /etc/sysconfig/network-scripts/ifcfg-ens3399 systemctl restart network nginx web2节点服务器的后续操作:


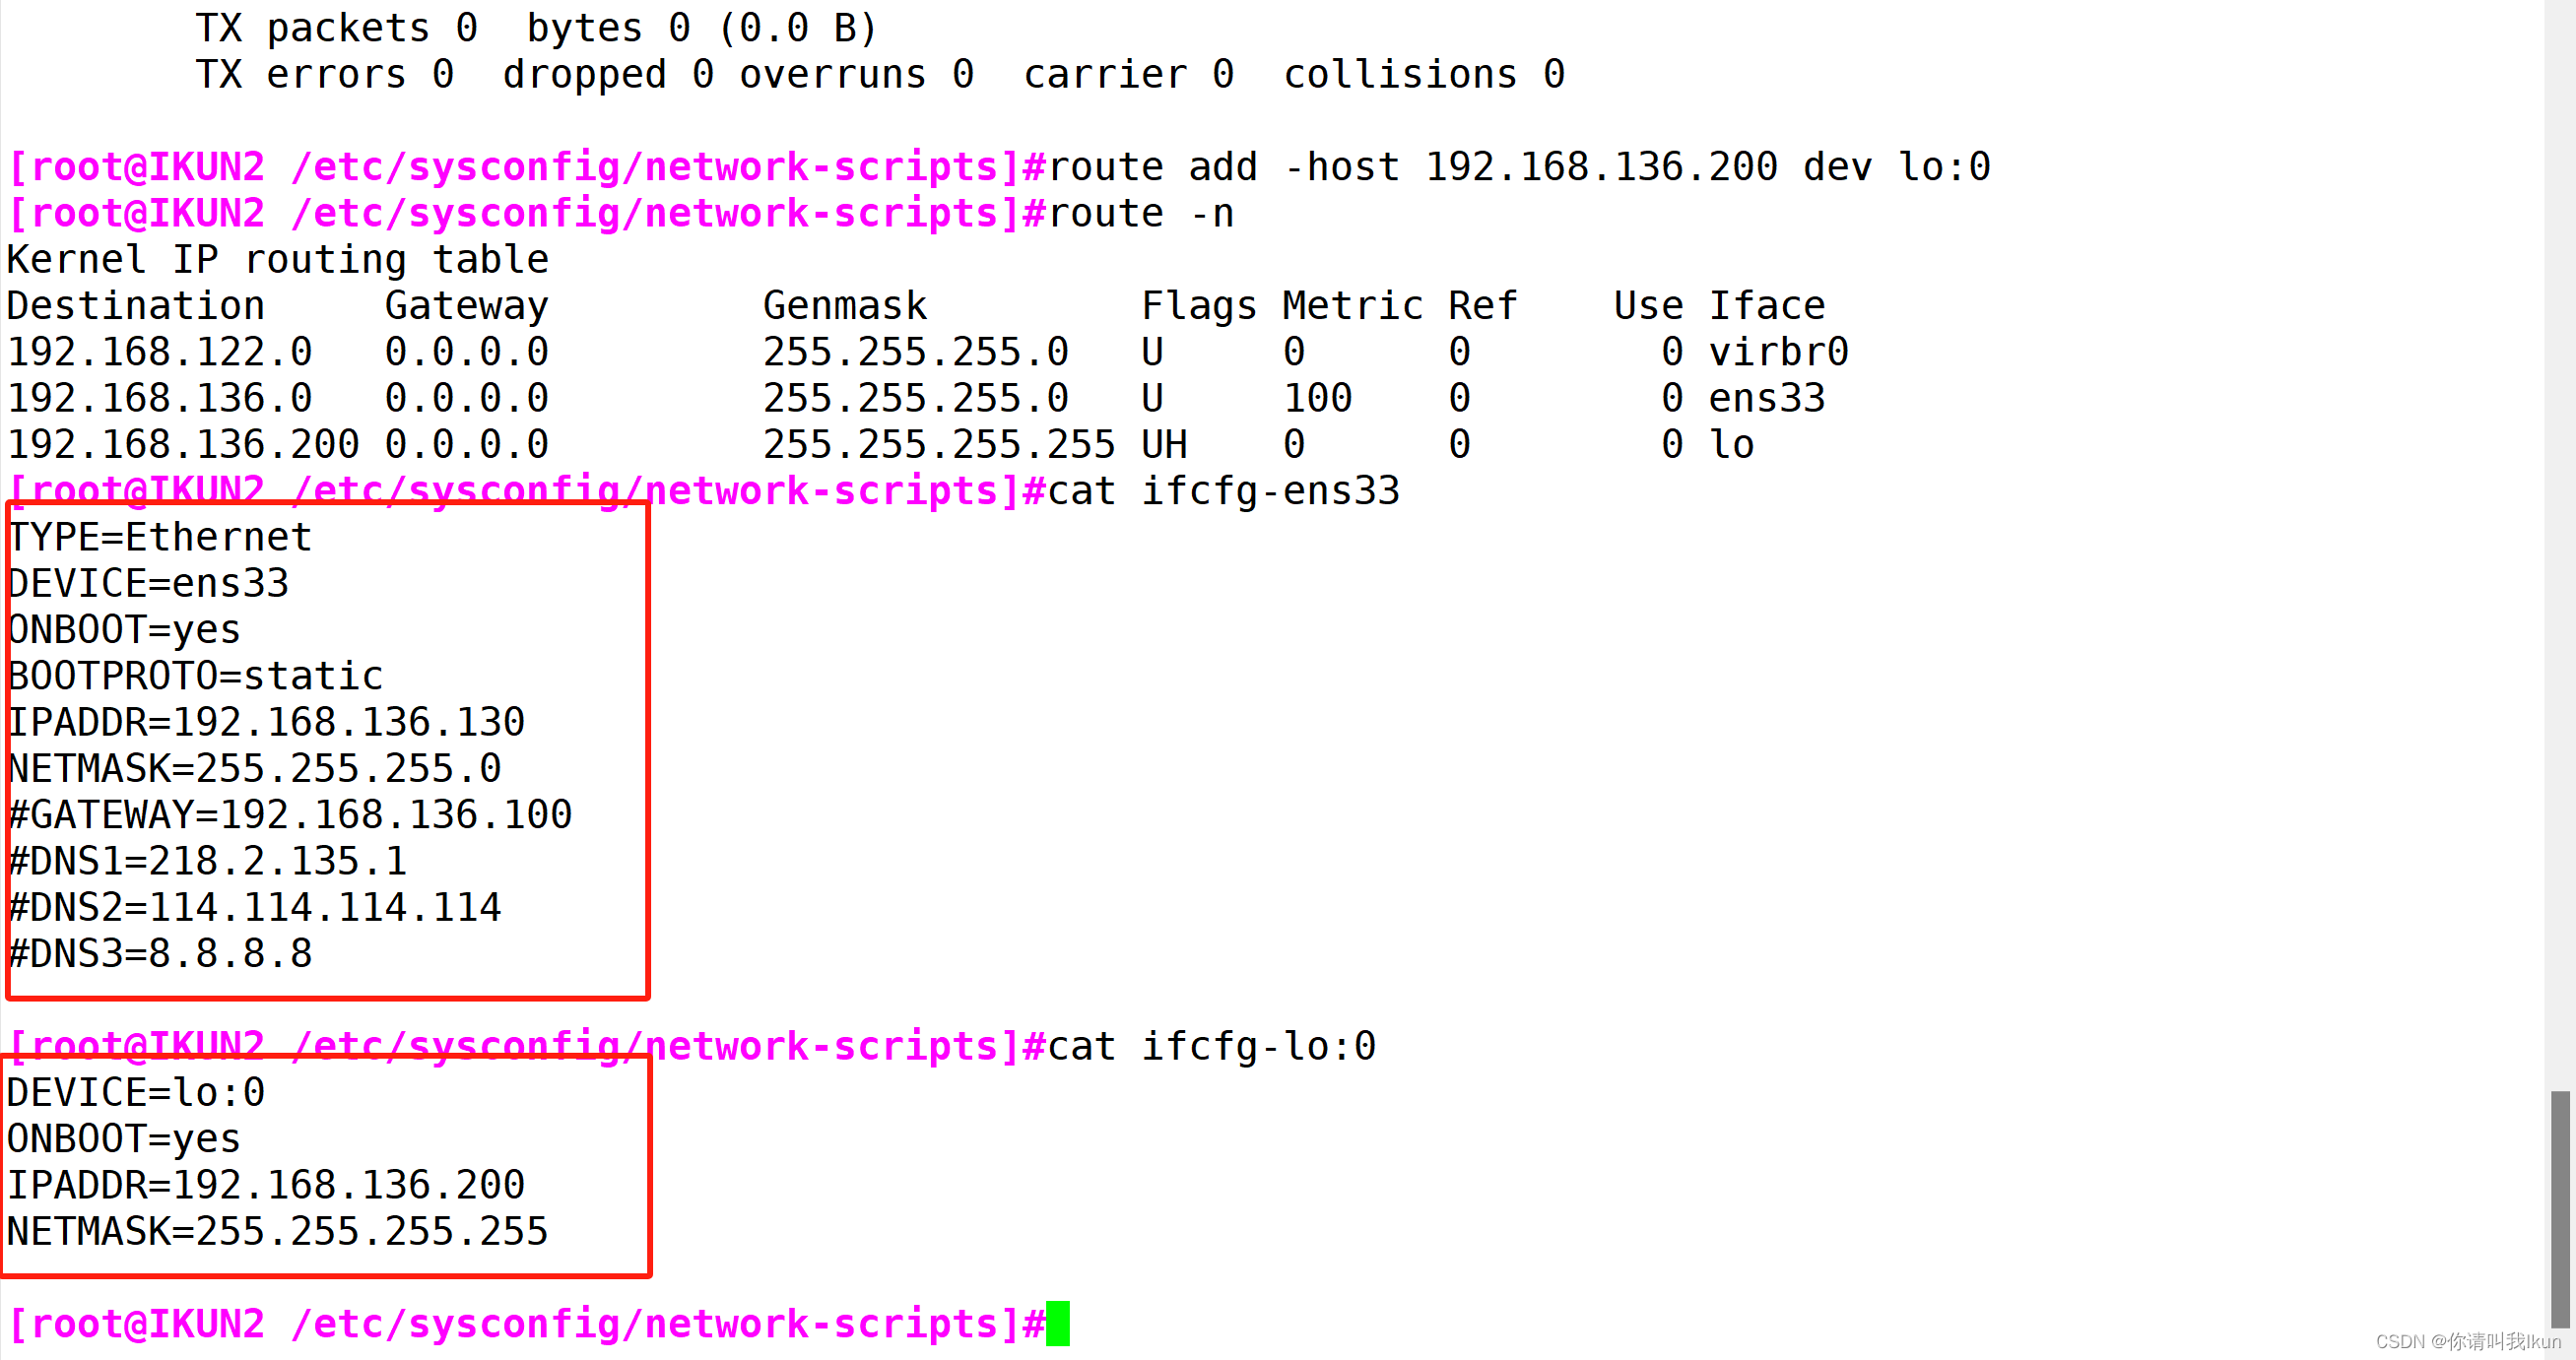
第三步:配置虚拟 IP 地址(192.168.136.200)
两台web节点服务器相同的操作:
68 vim nginx.conf 69 cat /etc/sysconfig/network-scripts/ifcfg-ens33 70 cd /etc/sysconfig/network-scripts/71 ls72 vim ifcfg-ens33 73 cat /proc/net/ip_vs74 systemctl restart network75 vim /etc/sysctl.conf 76 cp ifcfg-lo ifcfg-lo:077 ls78 vim ifcfg-lo:079 cp ifcfg-ens33 ifcfg-lo:080 vim ifcfg-lo:081 route add -host 192.168.136.200 dev lo:082 cat ifcfg-lo:083 systemctl restart network84 ip a85 ifconfig 86 route add -host 192.168.136.200 dev lo:087 route -n88 history
web1网卡设置:


web2网卡设置:

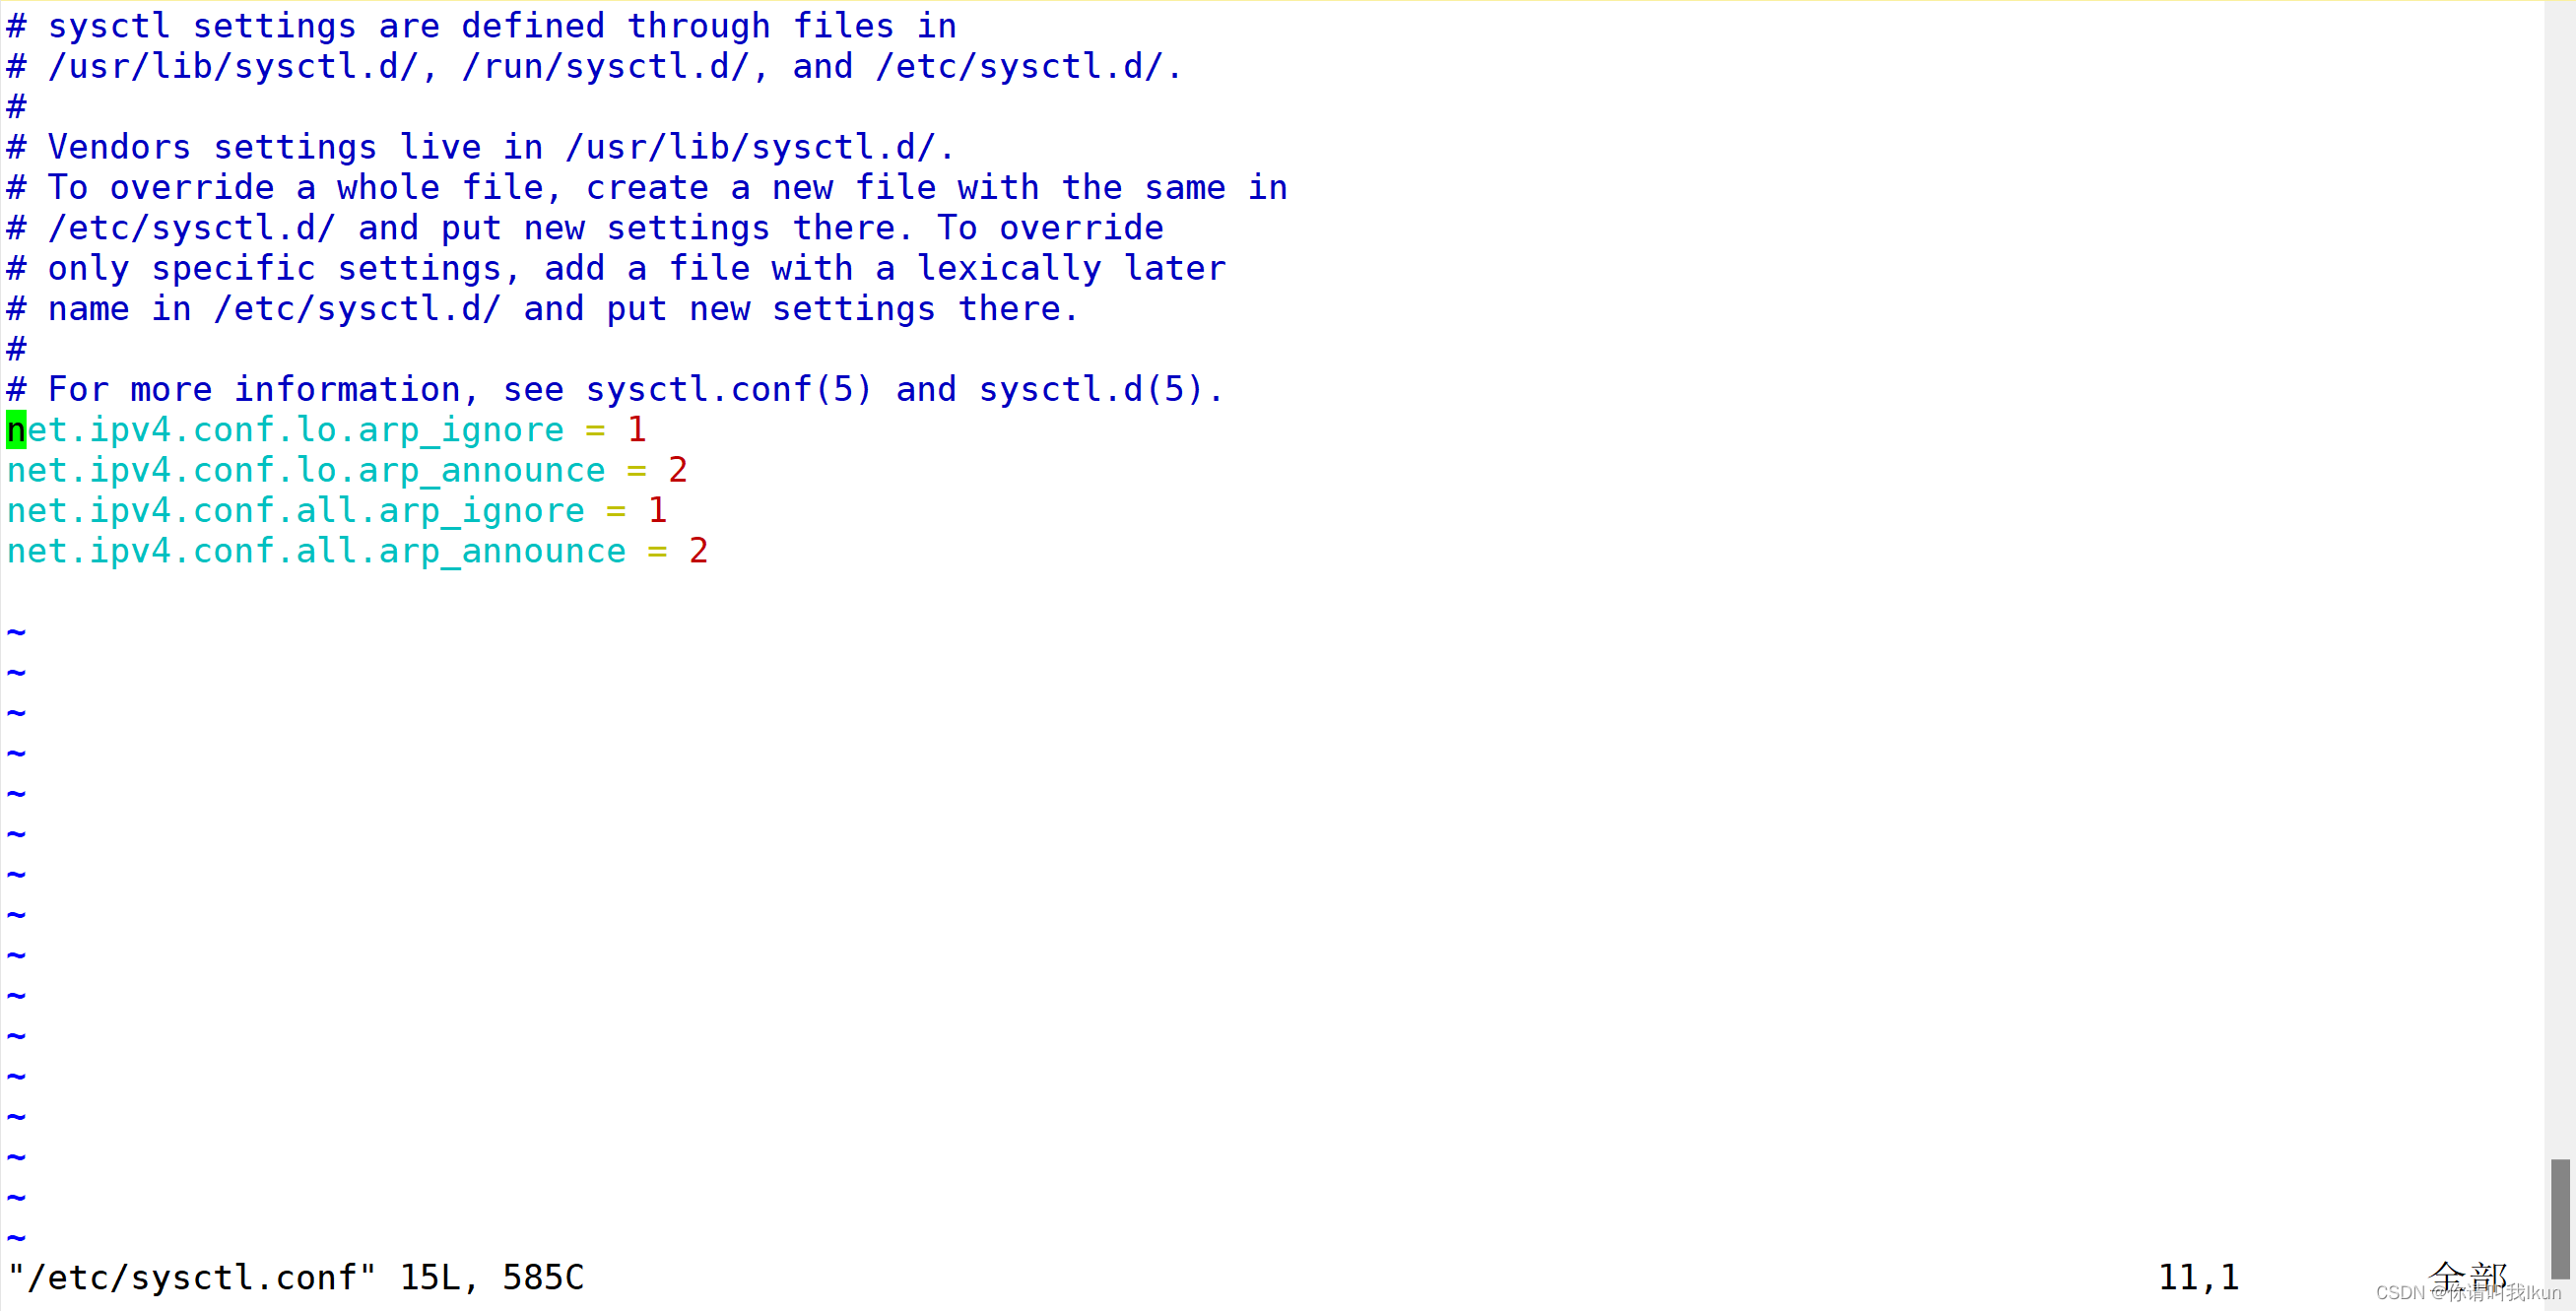
第四步:调整内核的 ARP 响应参数以阻止更新 VIP 的 MAC 地址,避免发生冲突
# sysctl settings are defined through files in
# /usr/lib/sysctl.d/, /run/sysctl.d/, and /etc/sysctl.d/.
#
# Vendors settings live in /usr/lib/sysctl.d/.
# To override a whole file, create a new file with the same in
# /etc/sysctl.d/ and put new settings there. To override
# only specific settings, add a file with a lexically later
# name in /etc/sysctl.d/ and put new settings there.
#
# For more information, see sysctl.conf(5) and sysctl.d(5).
net.ipv4.conf.lo.arp_ignore = 1     #系统只响应目的IP为本地IP的ARP请求
net.ipv4.conf.lo.arp_announce = 2   #系统不使用IP包的源地址来设置ARP请求的源地址,而选择发送接口的IP地址
net.ipv4.conf.all.arp_ignore = 1
net.ipv4.conf.all.arp_announce = 2
sysctl -p
两台web服务器同样操作 :
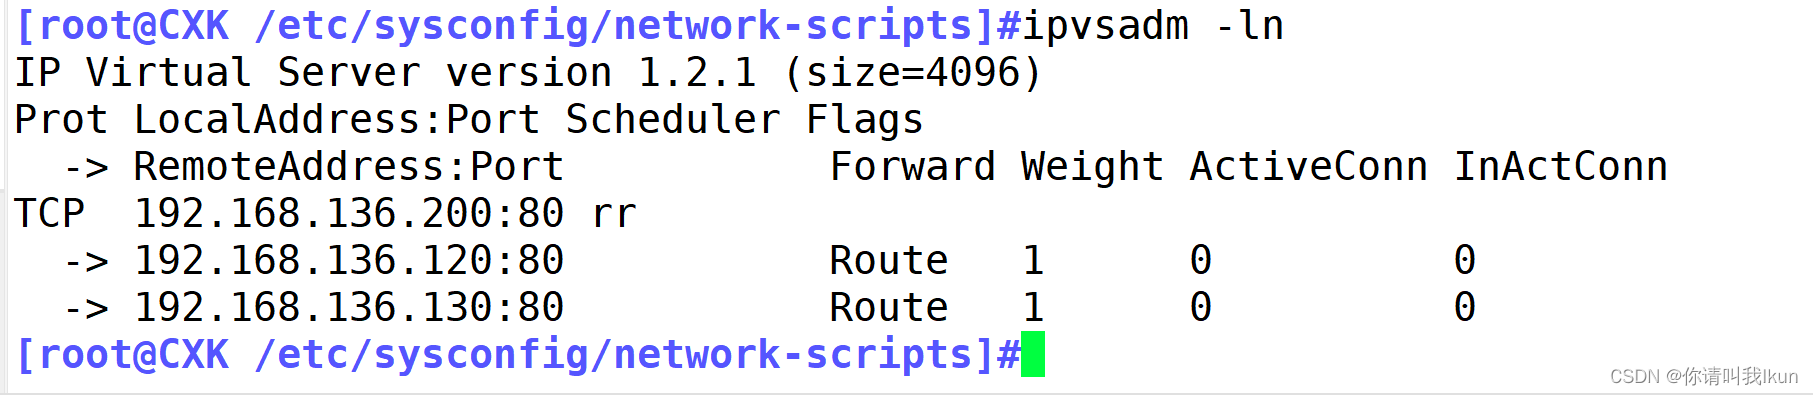
第五步:配置负载调度器(192.168.136.100)
102 ifconfig 103 cd /etc/sysconfig/network-scripts104 ls105 cp ifcfg-ens33 ifcfg-ens33:0106 vim ifcfg-ens33:0 #配置虚拟 IP 地址107 systemctl restart network108 vim /etc/sysctl.conf 109 yum -y install ipvsadm.x86_64 #安装服务110 ipvsadm-save > /etc/sysconfig/ipvsadm #不做这一项服务启动不了111 systemctl restart ipvsadm.service 112 modprobe ip_vs #启动ip_vs模块113 cat /proc/net/ip_vs #查看启动结果/ip_vs版本#配置负载分配策略114 ipvsadm -ln #查看节点状态,Route代表 DR模式115 ipvsadm -C #清空规则116 ipvsadm -ln117 ipvsadm -A -t 192.168.136.200:80 -s rr118 ipvsadm -a -t 192.168.136.200:80 -r 192.168.136.120:80 -g #若隧道模式,-g替换为-i119 ipvsadm -a -t 192.168.136.200:80 -r 192.168.136.130:80 -g120 ipvsadm121 ipvsadm -ln122 systemctl disable --now firewalld123 setenforce 0124 vim /etc/sysctl.conf #调整 proc 响应参数125 history


第六步:测试

