Threejs项目实战之三:根据JSON格式数据创建三维地图

目录
- 最终效果
- 实现原理
- 准备JSON格式数据
- 创建项目
- 编写代码
最终效果
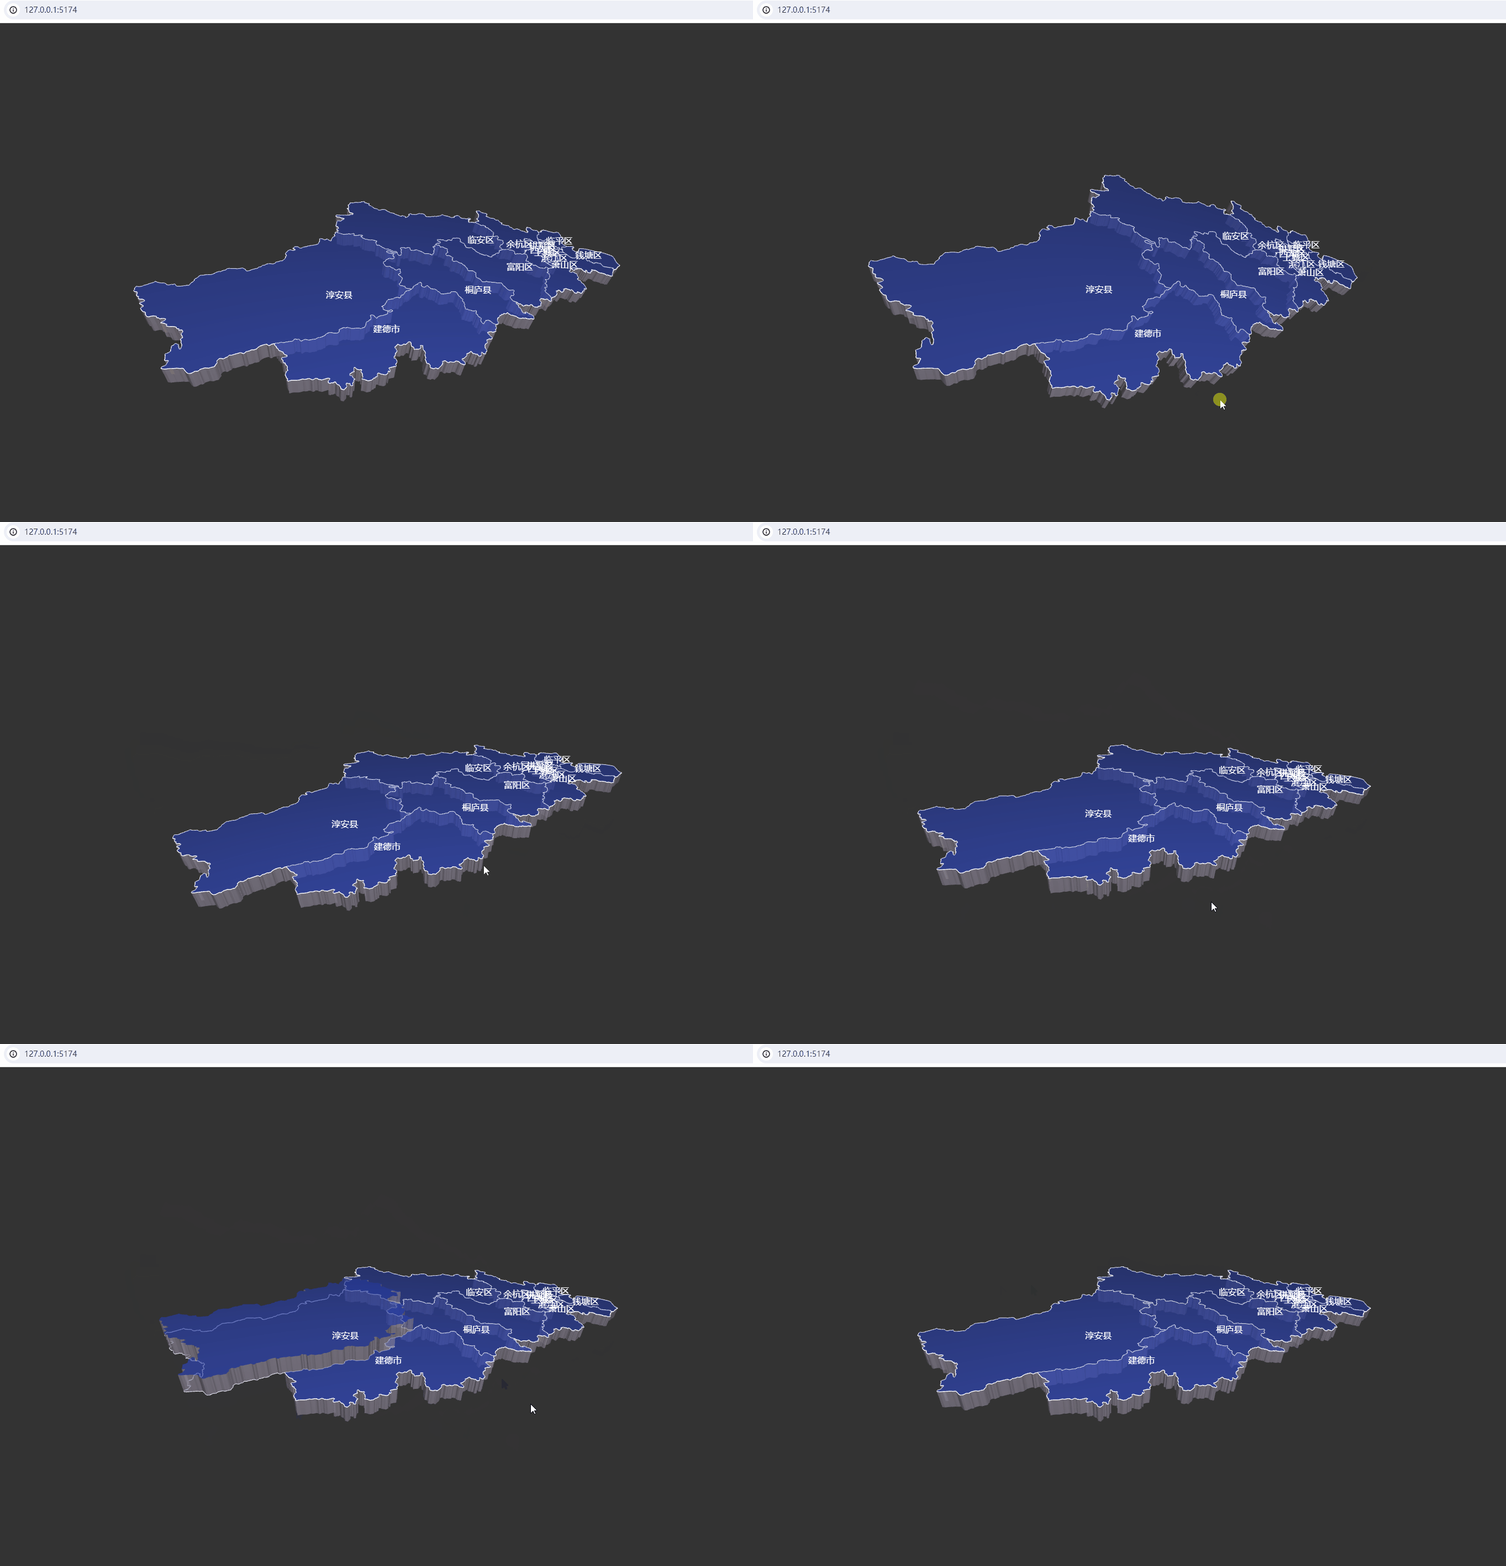
今天我们来实现在Threejs中根据JSON格式数据创建三维地图的效果,先看下最终项目完成后的效果展示
实现原理
通过读取JSON格式地图数据,获取地图边界及各区域边界经坐标,使用使用 D3.js 库中的 geoMercator() 方法进行墨卡托投影转换,将经纬度坐标转换为平面直角坐标系中的像素坐标,根据转换后的像素坐标,使用Threejs提供的ExtrudeGeometry方法对形状进行拉伸,形成三维立体效果;然后通过使用Threejs提供的Raycaster射线,获取鼠标与Mesh的焦点,并监听鼠标的mousemove移动事件和click点击事件,在mousemove移动事件处理Mesh变色,在click事件中对点击的边界进行拉伸,最终形成如图所示效果
准备JSON格式数据
JSON格式数据可以从阿里云提供的DataV工具中下载,具体下载地址为:https://datav.aliyun.com/portal/school/atlas/area_selector#&lat=30.332329214580188&lng=106.72278672066881&zoom=3.5,界面如下图所示:
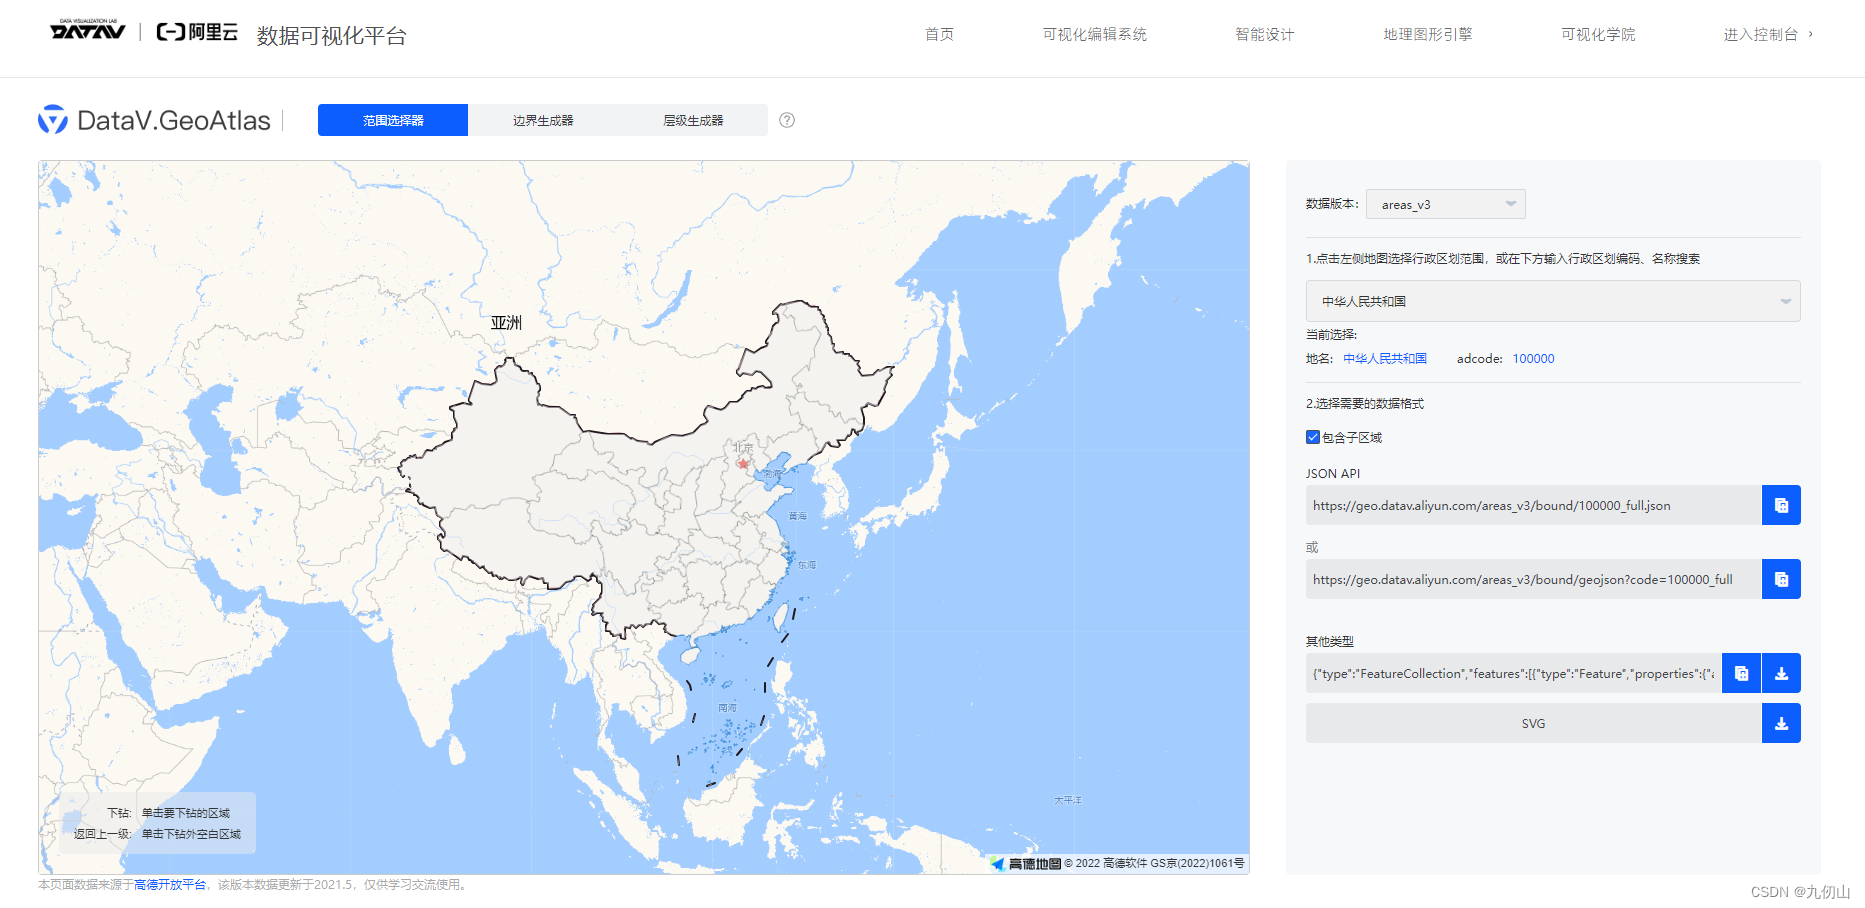
打开页面后,选择你需要下载的省、市或者区县的边界地图,点击右面的下载即可,我这里选取的是杭州及其下属区县的地图JSON格式数据。
创建项目
- 在D盘新建vue-map文件夹,鼠标右键点击新建的文件夹,使用vscode打开;
- 在vscode中使用快捷键Ctrl+Shift+~打开终端,在终端中使用vite构建工具创建项目,输入pnpm create earth-vue-map --template vue创建项目
- 创建成功后,在终端中输入cd earth-vue-map进入文件夹
- 输入pnpm i 安装依赖包
- 安装完成后,输入pnpm run div 启动项目,打开浏览器,可以看到系统默认的页面,说明项目环境搭建成功
- 安装ThreeJS库,在终端中输入pnpm install three安装threejs插件
- 安装D3库,在终端中输入 pnpm install d3安装D3库
- 删除vite构建工具为我们创建的HelloWord.vue文件和style.css中的样式,删除App.vue中的样式
- 在components文件夹下新建MapView.vue文件
- 在App.vue的Template模板中调用 MapView.vue
App.vue中代码如下<template><MapView></MapView> </template> <script setup> import MapView from './components/MapView.vue'; </script> <style scoped> </style>
style.css中的样式代码如下:
*{ margin: 0; padding: 0; list-style: none; }
- 在src目录下新建js文件夹,并在该文件夹下新建json文件夹,将上面下载的json文件拷贝到该文件夹。
编写代码
- 在MapView.vue的template模板中添加一个div,id设置为scene,作为承载Threejs的容器;
template模板中代码如下:
<template><div id="scene"></div>
</template>
- 在script标签中引入threejs
import * as THREE from 'three' - 在script标签中引入D3
import * as d3 from 'd3' - 引入threejs的OrbitControls控制器
import { OrbitControls } from 'three/examples/jsm/controls/OrbitControls' - 引入threejs的CSS2DRenderer和CSS2DObject
import { CSS2DRenderer,CSS2DObject } from 'three/examples/jsm/renderers/CSS2DRenderer' - 引入vue的onMounted方法
import { onMounted } from 'vue'; - 引入下载的json地理数据文件
import hangzhou from '../js/json/hangzhou.json' - 定义变量.分别定义renderer,scene,camera,orbitControls,map,labelRenderer,mouse等变量
let renderer, scene, camera, orbitControls, map, labelRenderer, mouse - 使用 D3.js 库中的 geoMercator() 方法来创建一个地理坐标系进行墨卡托投影转换
let projectpos = d3.geoMercator() .center([120.21,30.25]) .scale(1600) .translate([0,0]) - 定义init初始化函数
function init() {
}
- 在onMounted中调用init函数
onMounted(() => {init()
})
- 分别定义initScene方法初始化场景;定义initCamera方法初始化相机参数,定义initGeoJson方法处理json数据,定义initLight方法添加灯光效果,定义setRaycaster方法处理鼠标与地图的交互,定义initControls方法初始化控制器参数,定义initRenderer方法渲染场景,定义animate方法实现渲染动画,定义onClick方法用于鼠标点击实现;定义stretchMesh实现地图拉伸效果;代码如下
1、 initScene方法代码
2 、initCamera方法 代码const initScene = () => {scene = new THREE.Scene() }
3、initGeoJson方法代码const initCamera = () => {camera = new THREE.PerspectiveCamera(45,document.querySelector('#scene').clientWidth/document.querySelector('#scene').clientHeight)camera.position.set(50,50,50)camera.lookAt(scene.position) }
这里定义了一个initMap方法,该方法用于处理JSON数据,核心代码如下const initGeoJson() => {map = new THREE.Group()initMap(hangzhou) }
4、initLight方法代码const initMap = (hangzhou) => {hangzhou.features.forEach(element => {// 定义一个province 的省份3D对象const province = new THREE.Object3D()// 结构hangzhou.json中features.geometry中的coordinates// 对应的是每个点的坐标数组let { coordinates } = element.geometryinitText(element.properties)// 循环坐标数组coordinates.forEach(multiPolygon => {multiPolygon.forEach(polygon => {// 定义shape对象const shape = new THREE.Shape()const lineMaterial = new THREE.LineBasicMaterial({color: '#ffffff', })const lineGeometry = new THREE.BufferGeometry()const pointsArray = new Array()for (let i = 0; i < polygon.length; i++) {let [x, y] = projectpos(polygon[i])if (!isNaN(x)) {shape.moveTo(x, -y)}shape.lineTo(x, -y)pointsArray.push(new THREE.Vector3(x, -y, meshHeight))}lineGeometry.setFromPoints(pointsArray)const extrudsSettings = {depth: meshHeight,bevelEnabled: false,// 对挤出的形状应用是否斜角}const geometry = new THREE.ExtrudeGeometry(shape, extrudsSettings)const material = new THREE.MeshPhongMaterial({color: '#4161ff',transparent: true,opacity: 0.7,side: THREE.FrontSide})const material1 = new THREE.MeshLambertMaterial({color: '#cfc5de',transparent: true,opacity: 0.7,side: THREE.FrontSide})const mesh = new THREE.Mesh(geometry, [material, material1])const line = new THREE.Line(lineGeometry, lineMaterial)province.properties = element.properties// 将城市信息方到模型中,后续做动画用if (element.properties.centroid) {const [x, y] = projectpos(element.properties.centroid)province.properties._centroid = [x, y]}province.add(mesh)province.add(line)})})map.add(province)})scene.add(map) }
5、setRaycaster方法代码const initLight = () => {const ambientLight = new THREE.AmbientLight(0x404040, 1.2)scene.add(ambientLight)// 平行光const directionalLight = new THREE.DirectionalLight(0xffffff, 1.0)scene.add(directionalLight)// 点光源 - 照模型const test = new THREE.PointLight("#ffffff", 1.8, 20)test.position.set(1, -7, 7)scene.add(test)const testHelperMap = new THREE.PointLightHelper(test)scene.add(testHelperMap) }
6、initControls代码如下const setRaycaster = () => {rayCaster = new THREE.Raycaster()mouse = new THREE.Vector2() const onMouseMove = (event) => {mouse.x = (event.clientX / document.querySelector('#scene').clientWidth) * 2 - 1mouse.y = - (event.clientY / document.querySelector('#scene').clientHeight) * 2 + 1} // 点击地图事件const onClick = (event) => { if(selectedMesh === lastPick?.object){return}// 恢复上一次清空的 if (lastPick && 'point' in lastPick) {// 单击在Mesh上const mesh = lastPick.objectif(selectedMesh) { selectedMesh === mesh ? (resetMeshHeight(selectedMesh),selectedMesh = null) : (resetMeshHeight(selectedMesh),stretchMesh(mesh),selectedMesh = mesh) } else {// 没有选定的 Mesh,将选定的 Mesh 高度增加 // 伸展 meshstretchMesh(mesh)selectedMesh = mesh } } else { // 单击在 Mesh 区域外if(selectedMesh) { // 重置被选中的 mesh 的高度resetMeshHeight(selectedMesh)selectedMesh = null}// resetCameraTween()}}window.addEventListener('mousemove', onMouseMove, false);window.addEventListener('click', onClick, false); }
7、initRenderer代码如下const initControls = () => {orbitControls = new OrbitControls(camera, renderer.domElement)orbitControls.minDistance = 2 //距离屏幕最近的距离orbitControls.maxDistance = 5.5 //距屏幕最远距离// 鼠标左右旋转幅度orbitControls.minAzimuthAngle = -Math.PI / 4orbitControls.maxAzimuthAngle = Math.PI / 4// 鼠标上下转动幅度// 鼠标上下转动幅度orbitControls.minPolarAngle = Math.PI / 2orbitControls.maxPolarAngle = Math.PI - 0.1// 阻尼(惯性)orbitControls.enableDamping = trueorbitControls.dampingFactor = 0.04 }
8、animate代码如下const initRenderer = () => {renderer = new THREE.WebGLRenderer({antialias: true,})
以上就是根据JSON格式数据创建三维地图的核心代码,所有代码完成后,刷新浏览器,可以看到效果如下:const animate = () => {requestAnimationFrame(animate)animationMouseover()// cityanimationCityWave()animationCityEdgeLight()animationCityMarker()orbitControls.update()renderer.render(scene, camera)labelRenderer.render(scene, camera) }
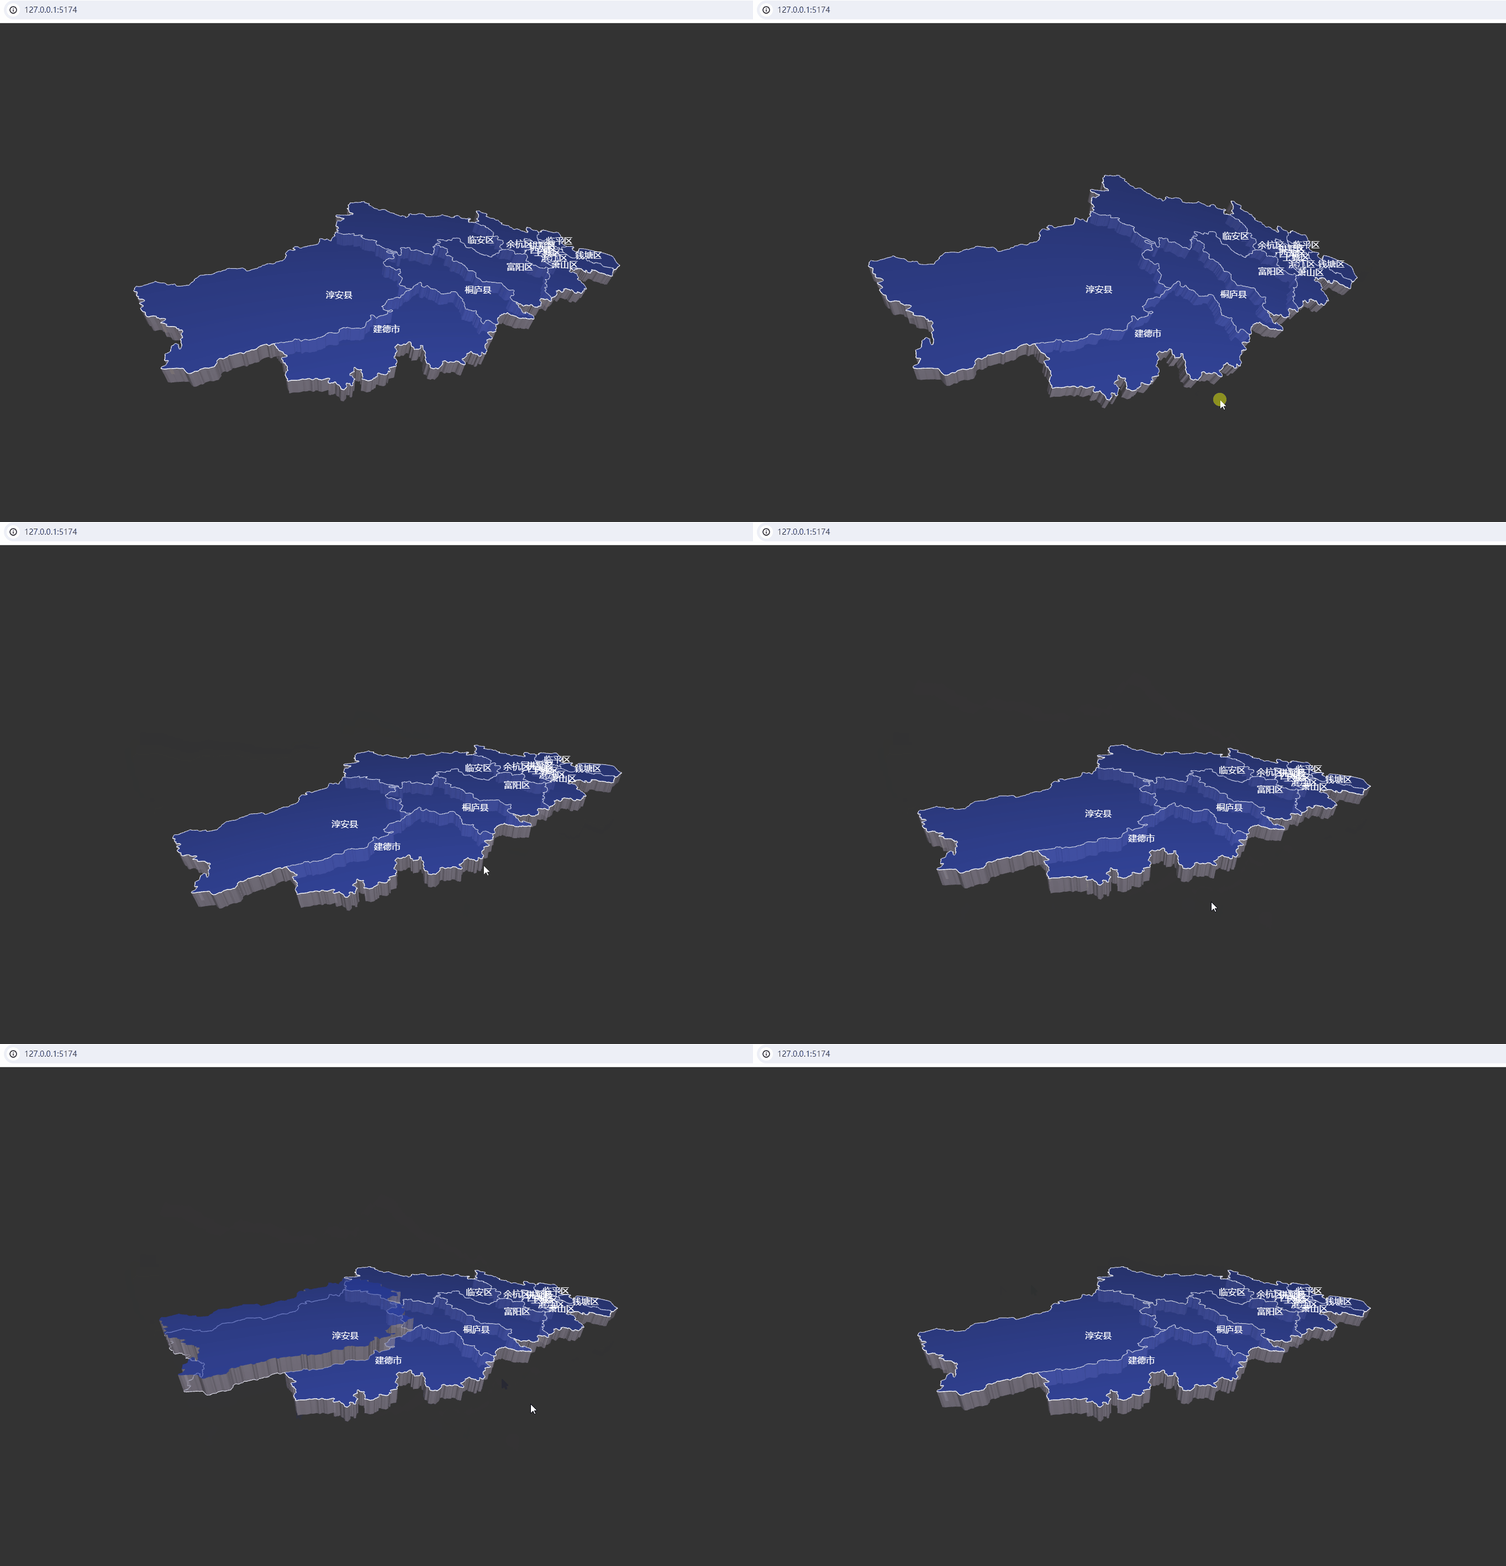
ok,threejs项目实战的第三个小项目就实现了,小伙伴们有疑问的评论区留言,喜欢的小伙伴点赞关注+收藏哦!